
This post will guide you to create a simple web application using Spring Boot and Apache Spark.
For the demonstration we are going to build a maven project with Spring Boot 2.1.2 using the Spring Initializr web-based interface.
Cheers to the beginning 🙂
Please follow the steps below to create the classic Apache Spark’s WordCount example with Spring Boot :
1) Creating the Web Application template:
We’ll be using Spring Initializr to create the web application project structure.
Spring Initializr is a web application used to generate a Spring Boot project structure either in Maven or Gradle project specification.
Spring Initializr can be used in several ways, including:
- A web-based interface
- Using Spring Tool Suite
- Using the Spring Boot CLI
For brevity we’ll be using the Spring initializr web interface.
- Go to https://start.spring.io/.
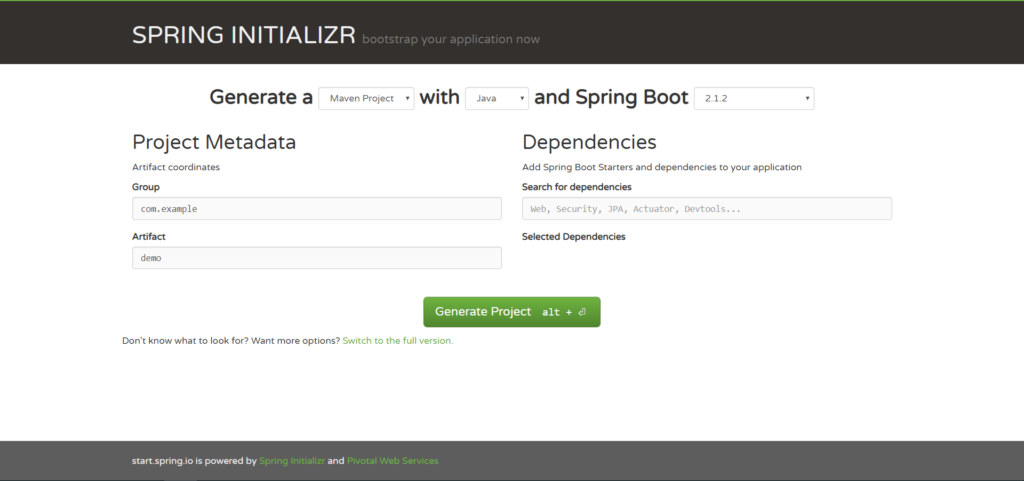
Note: By default, the project type is Maven Project and if you wish to select Gradle then just click on the Maven Project drop down and select Gradle Project.
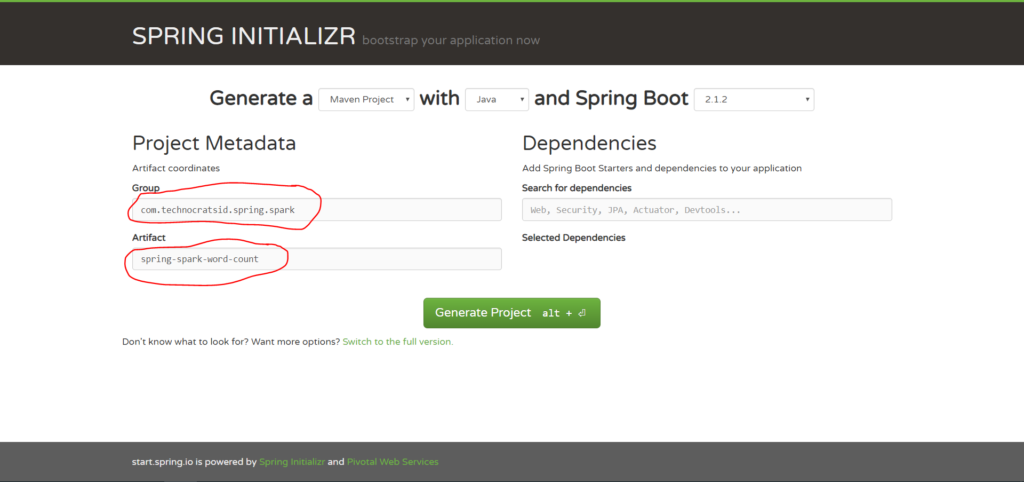
2. Enter Group and Artifact details:
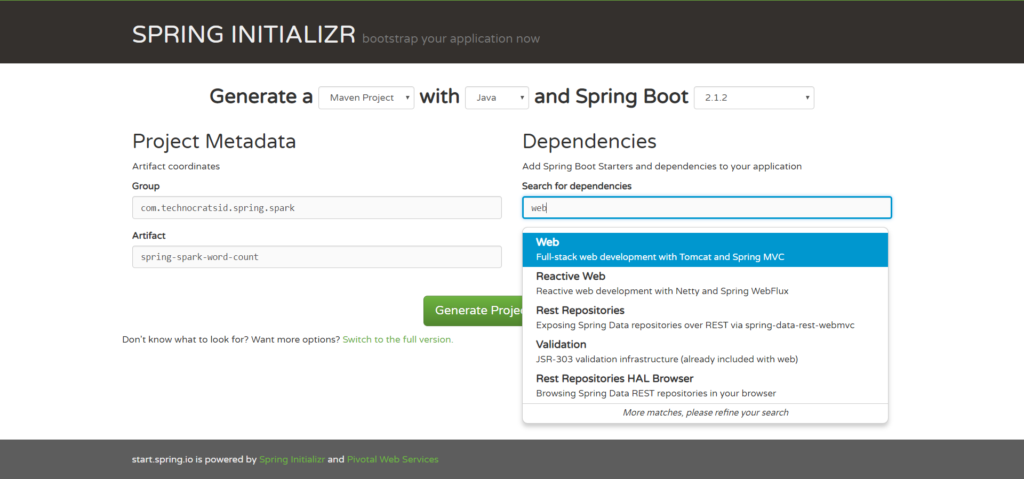
3. Type Web in Search for dependencies and select the Web option.
4. Now click on Generate Project:
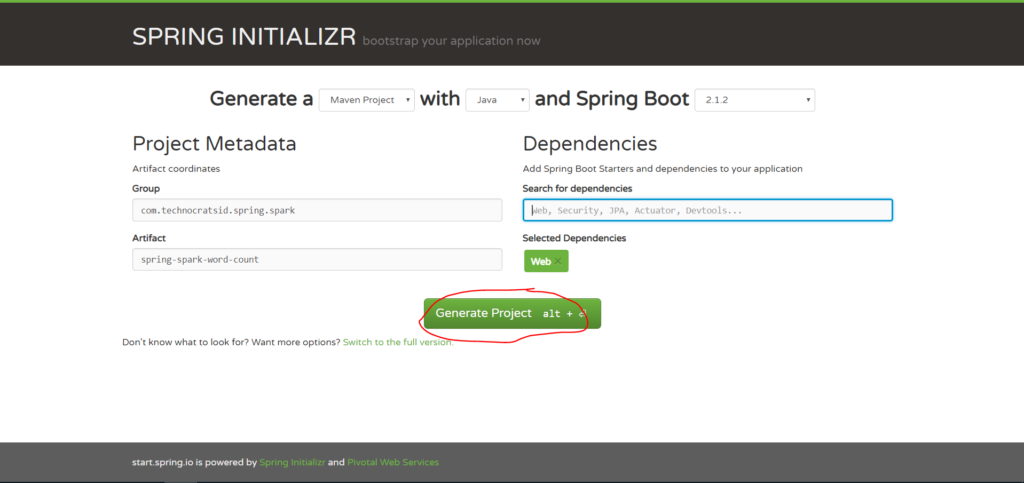
This will generate and download the spring-spark-word-count.zip file which is your maven project structure.
5. Unzip the file and then import it in your favourite IDE.
After you’ve imported the project in your IDE (in my case Eclipse) the project structure looks as follows:
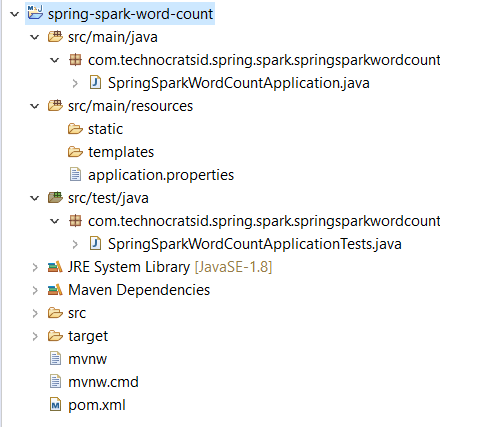
The package names are automatically generated with the combination of group and artifact details.
Moving forward I’ve changed the package names from com.technocratsid.spring.spark.springsparkwordcount to com.technocratsid for brevity.
You can even do this while generating the project using Spring Initializr web interface. You just have to switch to full version and there you’ll find the option to change the package name.
2) Adding the required dependencies in pom.xml:
Add the following dependencies in your project’s pom.xml
<dependency>
	<groupId>com.thoughtworks.paranamer</groupId>
	<artifactId>paranamer</artifactId>
	<version>2.8</version>
</dependency>
<dependency>
	<groupId>org.apache.spark</groupId>
	<artifactId>spark-core_2.12</artifactId>
	<version>2.4.0</version>
</dependency>
Note: You might be thinking why we need to add the paranamer dependency as spark core dependency already has it? This is because JDK8 is compatible with paranamer version 2.8 or above and spark 2.4.0 uses paranamer version 2.7. So, if you won’t add the 2.8 version, you’ll get an error like this:
Request processing failed; nested exception is java.lang.ArrayIndexOutOfBoundsException: 10582
After this your complete pom.xml should look as follows:
<?xml version="1.0" encoding="UTF-8"?>
<project xmlns="http://maven.apache.org/POM/4.0.0"
	xmlns:xsi="http://www.w3.org/2001/XMLSchema-instance"
	xsi:schemaLocation="http://maven.apache.org/POM/4.0.0 http://maven.apache.org/xsd/maven-4.0.0.xsd">
	<modelVersion>4.0.0</modelVersion>
	<parent>
		<groupId>org.springframework.boot</groupId>
		<artifactId>spring-boot-starter-parent</artifactId>
		<version>2.1.2.RELEASE</version>
		<relativePath /> <!-- lookup parent from repository -->
	</parent>
	<groupId>com.technocratsid.spring.spark</groupId>
	<artifactId>spring-spark-word-count</artifactId>
	<version>0.0.1-SNAPSHOT</version>
	<name>Spring Spark Word Count</name>
	<description>Demo project for Spring Boot</description>

	<properties>
		<java.version>1.8</java.version>
	</properties>

	<dependencies>
		<dependency>
			<groupId>org.springframework.boot</groupId>
			<artifactId>spring-boot-starter-web</artifactId>
		</dependency>
		<dependency>
			<groupId>com.thoughtworks.paranamer</groupId>
			<artifactId>paranamer</artifactId>
			<version>2.8</version>
		</dependency>
		<dependency>
			<groupId>org.apache.spark</groupId>
			<artifactId>spark-core_2.12</artifactId>
			<version>2.4.0</version>
		</dependency>
		<dependency>
			<groupId>org.springframework.boot</groupId>
			<artifactId>spring-boot-starter-test</artifactId>
			<scope>test</scope>
		</dependency>
	</dependencies>

	<build>
		<plugins>
			<plugin>
				<groupId>org.springframework.boot</groupId>
				<artifactId>spring-boot-maven-plugin</artifactId>
			</plugin>
		</plugins>
	</build>

</project>
3) Adding the Spark Config:
Create a class SparkConfig.java in package com.technocratsid.config.
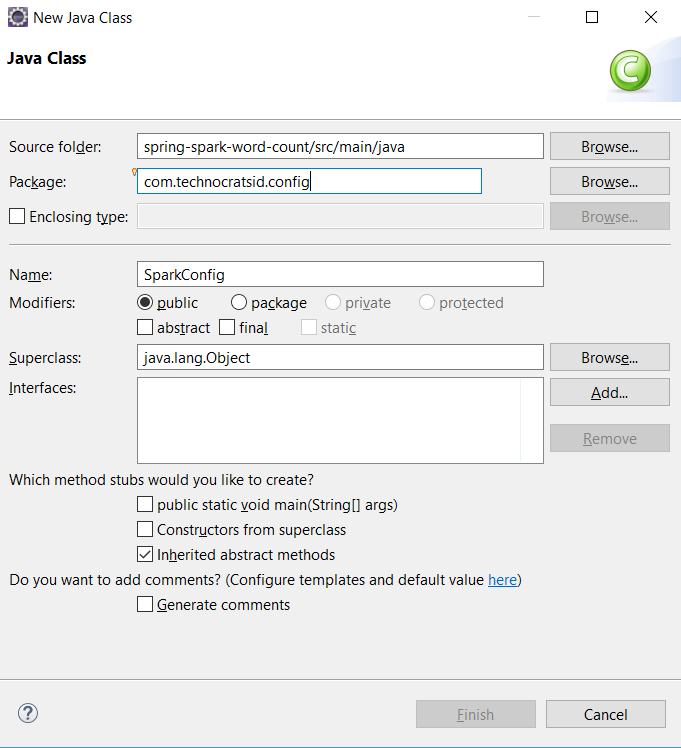
Add the following content to SparkConfig.java:
@Configuration
public class SparkConfig {

	@Value("${spark.app.name}")
	private String appName;
	@Value("${spark.master}")
	private String masterUri;

	@Bean
	public SparkConf conf() {
		return new SparkConf().setAppName(appName).setMaster(masterUri);
	}

	@Bean
	public JavaSparkContext sc() {
		return new JavaSparkContext(conf());
	}

}
Import the packages.
Note: Here we are declaring the JavaSparkContext and SparkConf as beans (using @Bean annotation) this tell the spring container to manage them for us.
@Configuration is used to tell Spring that this is a Java-based configuration file and contains the bean definitions.
@Value annotation is used to inject value from a properties file based on the the property name.
The application.properties file for properties spark.app.name and spark.master is inside src/main/resources and looks like this:
spark.app.name=Spring Spark Word Count Application
spark.master=local[2]
local[2] indicates to run spark locally with 2 worker threads.
If you wish to run the application with your remote spark cluster then edit spark.master pointing to your remote cluster.
4) Creating a service for Word Count:
Create a class WordCountService.java in package com.technocratsid.service and add the following content:
@Service
public class WordCountService {

	@Autowired
	JavaSparkContext sc;

	public Map<String, Long> getCount(List<String> wordList) {
		JavaRDD<String> words = sc.parallelize(wordList);
		Map<String, Long> wordCounts = words.countByValue();
		return wordCounts;
	}

}
Import the packages.
Note: This class holds our business logic which is converting the list of words into a JavaRDD and then counting them by value by calling countByValue() and returning the results.
@Service tells Spring that this file performs a business service.
@Autowired tells Spring to automatically wire or inject the value of variable from the beans which are managed by the the spring container.
5) Register a REST Controller with an endpoint:
Create a class WordCountController.java in package com.technocratsid.controller and add the following content:
@RestController
public class WordCountController {

	@Autowired
	WordCountService service;

	@RequestMapping(method = RequestMethod.POST, path = "/wordcount")
	public Map<String, Long> count(@RequestParam(required = true) String words) {
		List<String> wordList = Arrays.asList(words.split("\\|"));
		return service.getCount(wordList);
	}
}
Import the packages.
Note: This class registers an endpoint /wordcount for a POST request with a mandatory query parameter words which is basically a string like (“abc|pqr|xyz”) and we are splitting the words on pipes (|) to generate a list of words and then using our business service’s count() method with the list of words to get the word count.
6) Run the application:
Either run the SpringSparkWordCountApplication class as a Java Application from your IDE or use the following command:
mvn spring-boot:run7) Test your application from a REST client:
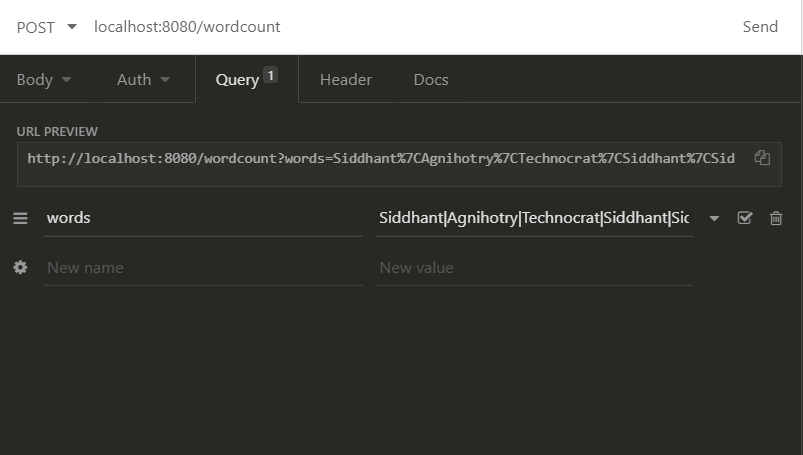
For this demo I am using Insomnia REST Client which is quite handy with simple interface. You can use any REST client you want like Postman and Paw etc.
Once your application is up and running perform a POST request to the URL http://localhost:8080/wordcount with query parameter words=”Siddhant|Agnihotry|Technocrat|Siddhant|Sid”.
The response you’ll get:
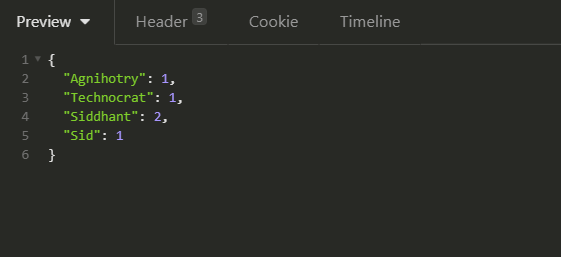
You’ve just created your first Spring Boot Application and integrated Apache Spark with it.
If you want to hack into the code check out the github link.
Recommended book to learn Apache Spark: https://amzn.to/3f7XpAT


One thought on “Spring Boot + Apache Spark”
Comments are closed.
I had to add @ComponentScan({“com.technocratsid.controller”}) in the main file of the application for it to work.
@SpringBootApplication @ComponentScan({“com.technocratsid.controller”})
public class SpringSparkWordCountApplication {