Install Kafka on macOS

I really like Homebrew to install stuff on macOS. So in this tutorial I’ll be using Hombrew to install Apache Kafka on macOS.

Install Homebrew:

Open Terminal, paste the following command and then press Return key:

$ /usr/bin/ruby -e "$(curl -fsSL https://raw.githubusercontent.com/Homebrew/install/master/install)"

The above command will install Homebrew. Once it is installed, follow the next steps:

1)  Install Java8:

After Homebrew is installed, you can just paste the following commands in Terminal and press Return to install java on macOS:

$ brew tap adoptopenjdk/openjdk
$ brew cask install adoptopenjdk8

The above commands will install openjdk 8. In order to validate the java installation, execute the following command in Terminal:

$ java -version

If you get the following output, it means that java is installed correctly:

openjdk version "1.8.0_212"
OpenJDK Runtime Environment (AdoptOpenJDK)(build 1.8.0_212-b04)
OpenJDK 64-Bit Server VM (AdoptOpenJDK)(build 25.212-b04, mixed mode)

2) Install Kafka:

To install Kafka on macOS: open Terminal, paste the following command and then press Return:

$ brew install kafka

The above command will install Kafka along with Zookeeper.

Start Zookeeper:

To start ZooKeeper, paste the following command in the Terminal and press Return:

$ zookeeper-server-start /usr/local/etc/kafka/zookeeper.properties

Once ZooKeeper is started you’ll see something like this in the console:

INFO binding to port 0.0.0.0/0.0.0.0:2181 (org.apache.zookeeper.server.NIOServerCnxnFactory)

Start Kafka:

To start Kafka, paste the following command in another Terminal and press Return:

$ kafka-server-start /usr/local/etc/kafka/server.properties

Once Kafka is started you’ll see something like this in the console:

INFO [KafkaServer id=0] started (kafka.server.KafkaServer)

Create a Kafka topic:

Open another Terminal and execute the following command to create a topic testTopic with 1 partition and 1 replication factor:

kafka-topics --create --zookeeper localhost:2181 --replication-factor 1 --partitions 1 --topic testTopic

Produce messages to the created topic:

In the same Terminal prompt, start a kafka-console-producer and produce some messages:

$ kafka-console-producer --broker-list localhost:9092 --topic testTopic
>Hello
>How are you?

Consume the messages produced by the producer:

Open another Terminal and start a kafka-console-consumer which subscribes to testTopic:

$ kafka-console-consumer --bootstrap-server localhost:9092 --topic testTopic --from-beginning
Hello
How are you?

The messages which are produced by the kafka-console-producer will be visible on the kafka-console-consumer console.

Congratulations on setting up a single broker Kafka setup on macOS!

Exploring Twitter Data using Elasticseach & Kibana’s Canvas

After thinking a lot about what to write next, I stumbled upon a very cool idea.

And this is what I thought I should do: Discover something interesting using code ?

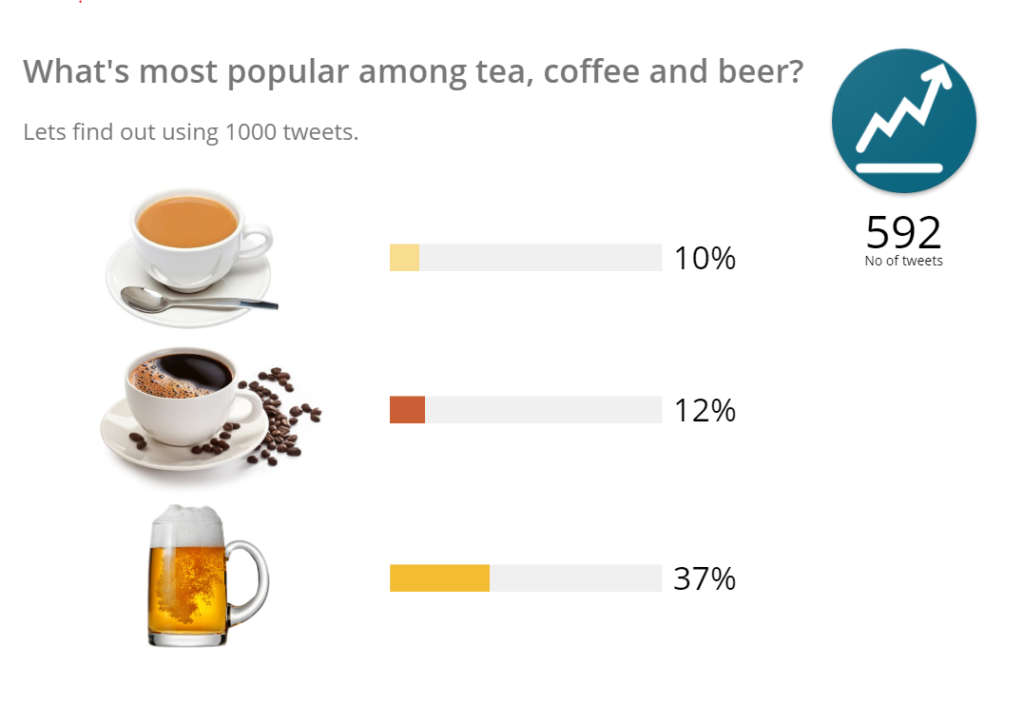
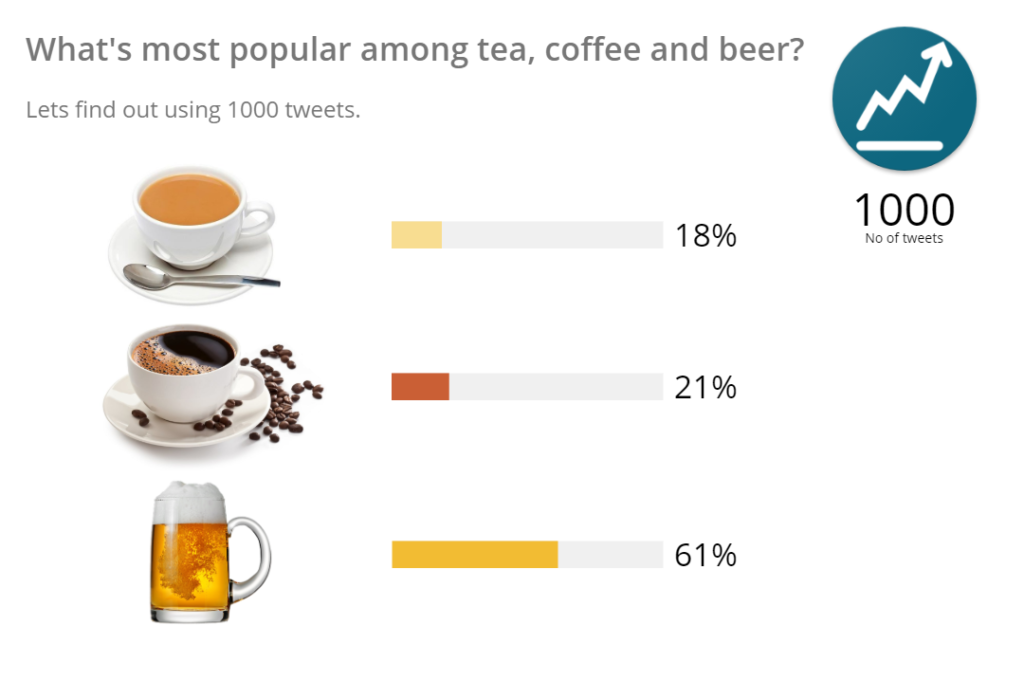
Let’s find out what’s the most popular drink among tea, coffee and beer in the world?  All using code!!!

Yes, you heard it right.

How do we do this?

First and foremost, we need data!! And by data, I mean real time data because trends may change day to day. Social media is full of data, and we should thank Twitter for writing a Java HTTP client for streaming real-time Tweets using Twitter’s own Streaming API.

This client is known as Hosebird Client (hbc). Though it was written by Twitter a long time back and Twitter has deprecated some of its features but it will perfectly work for our requirement.

Also, we need to store the streaming data into some data-store and for this purpose we’ll be using Elasticsearch.

Why Elasticsearch?

The sole purpose of using Elasticsearch is to use Kibana’s Canvas to further visualise the data.

Canvas is a whole new way of making data look amazing. Canvas combines data with colours, shapes, text, and your own imagination to bring dynamic, multi-page, pixel-perfect, data displays to screens large and small.

Elastic

In simple words it is an application which lets you visualise data stored in Elasticsearch in a better and customised way in real time (while data is being ingested in Elasticsearch) and is currently in beta release.

You’ll be thrilled to see the end result using Elasticsearch Canvas.

Note: For the demonstration Elasticsearch & Kibana 6.5.2 are used.

Prerequisites:

  • Make sure Elasticsearch and Kibana are installed.

Let’s get started. Cheers to the beginning ?

Follow the steps below to implement the above concept:

1) Setting up a maven project:

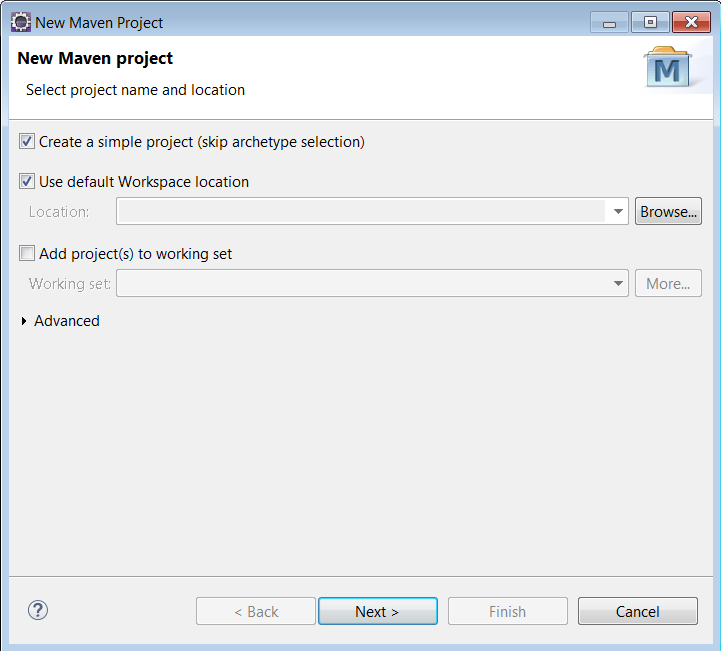
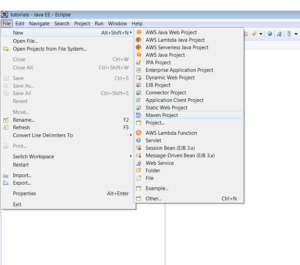
1.1) Create a Maven Project (for the demonstration I am using Eclipse IDE, you can use any IDE):

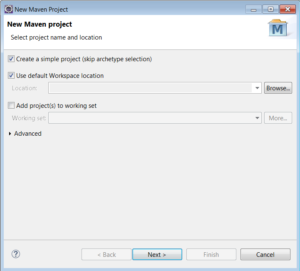
1.2) Skip the archetype selection:

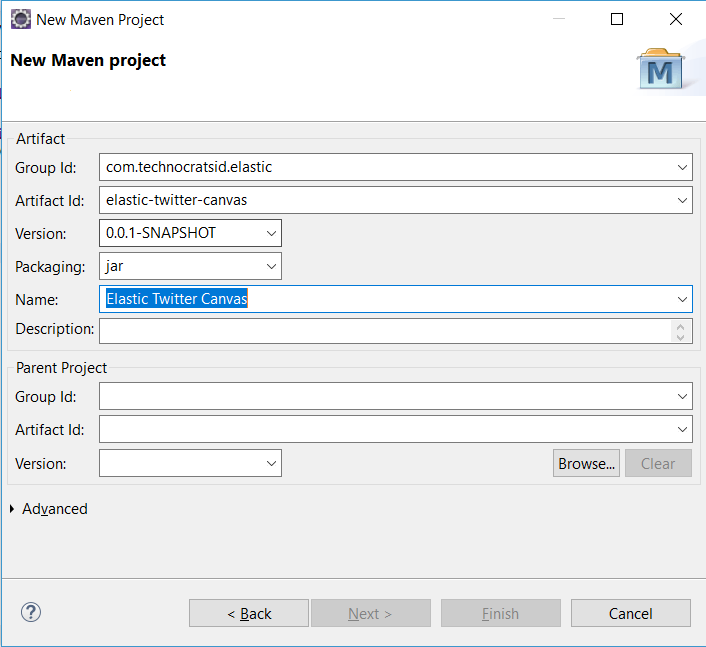
1.3) Add the Group Id, Artifact Id and Name, then click Finish:

2) Configuring the maven project:

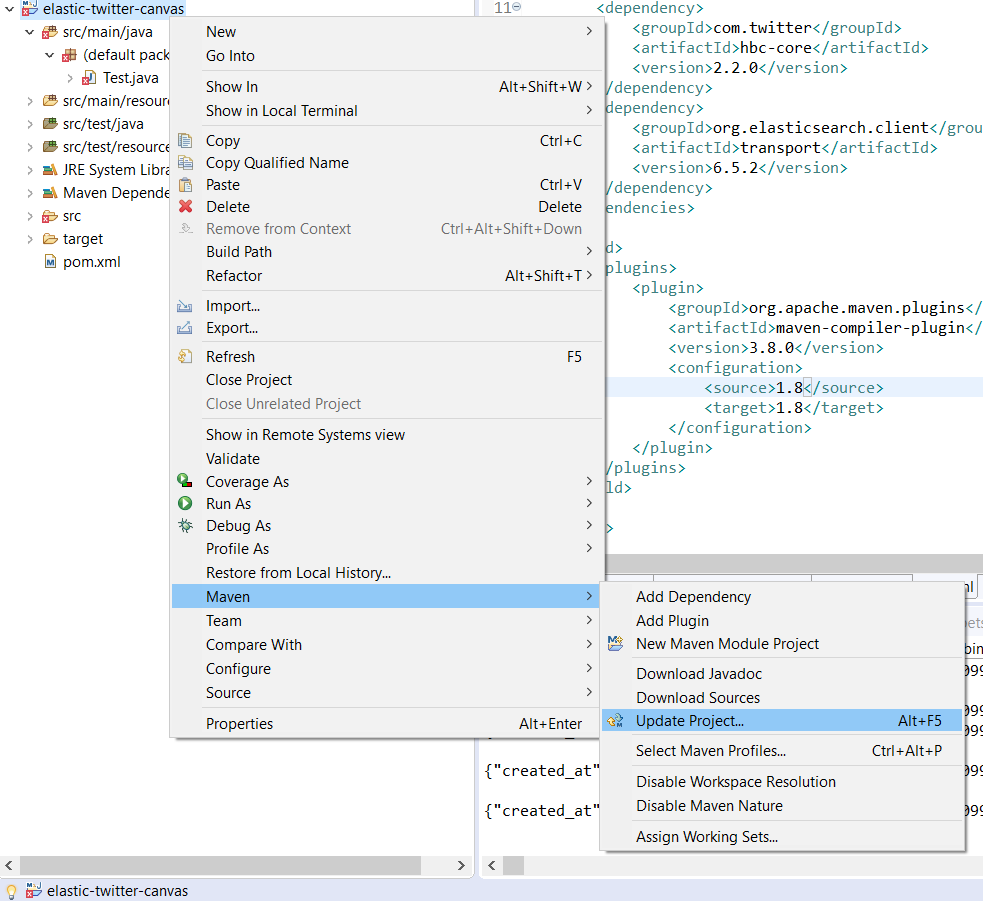
2.1) Open the pom.xml and add the following dependencies:

<dependencies>
	<dependency>
		<groupId>com.twitter</groupId>
		<artifactId>hbc-core</artifactId>
		<version>2.2.0</version>
	</dependency>
	<dependency>
		<groupId>org.elasticsearch.client</groupId>
		<artifactId>transport</artifactId>
		<version>6.5.2</version>
	</dependency>
</dependencies>

These are the Java client libraries of Twitter and Elasticsearch.

2.2) Configuring the maven-compiler-plugin to use Java 8:

<project>
  [...]
  <build>
    [...]
    <plugins>
      <plugin>
        <groupId>org.apache.maven.plugins</groupId>
        <artifactId>maven-compiler-plugin</artifactId>
        <version>3.8.0</version>
        <configuration>
          <source>1.8</source>
          <target>1.8</target>
        </configuration>
      </plugin>
    </plugins>
    [...]
  </build>
  [...]
</project>

2.3) After this update the maven project:

Alternately you can also press Alt+F5 after selecting the project.

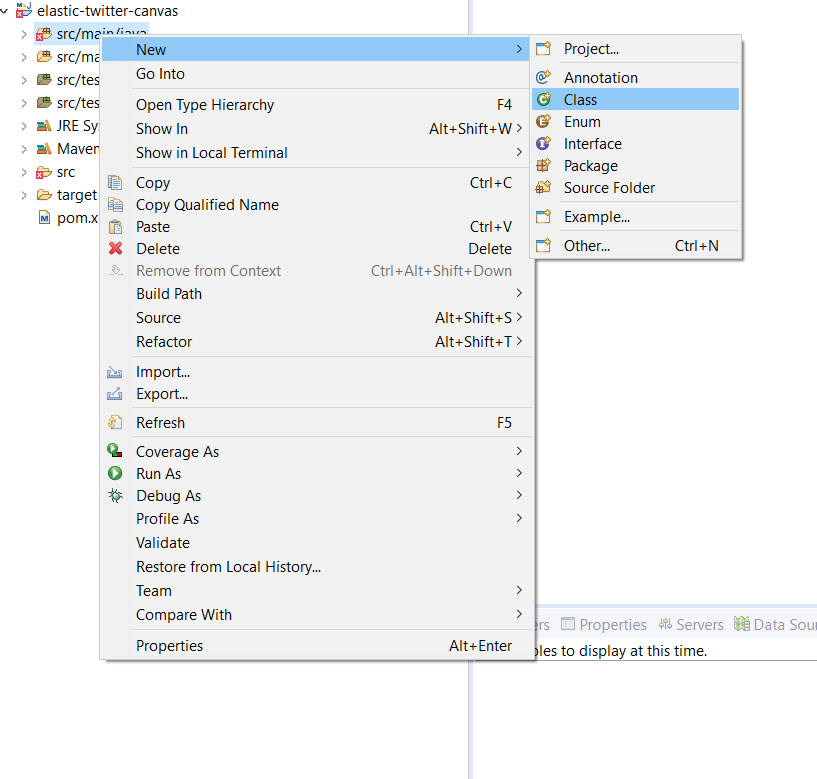
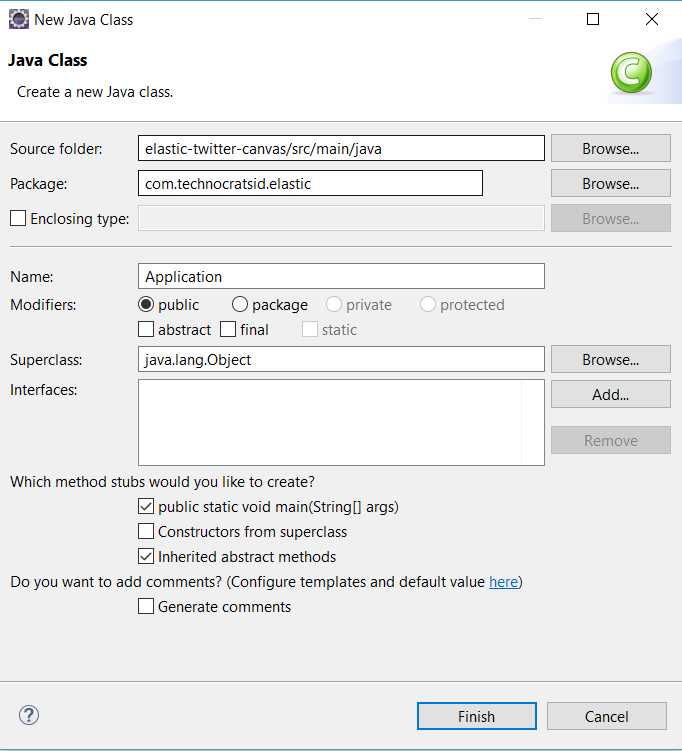
3) Create an Application class:

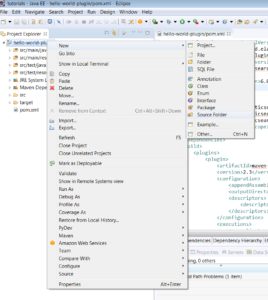
3.1) Go to src/main/java and create a new class:

3.2) Add the Package and Name of the class then click Finish:

4) Configure the Twitter Java Client:

4.1) Create a static method createTwitterClient in Application class and add the following lines of code:

public static Client createTwitterClient(BlockingQueue<String> msgQueue, List<String> terms) {
	Hosts hosebirdHosts = new HttpHosts(Constants.STREAM_HOST);
	StatusesFilterEndpoint hosebirdEndpoint = new StatusesFilterEndpoint();
	hosebirdEndpoint.trackTerms(terms); // tweets with the specified terms
	Authentication hosebirdAuth = new OAuth1(consumerKey, consumerSecret, token, secret);
	ClientBuilder builder = new ClientBuilder().name("Twitter-Elastic-Client").hosts(hosebirdHosts)
				.authentication(hosebirdAuth).endpoint(hosebirdEndpoint)
				.processor(new StringDelimitedProcessor(msgQueue));
	Client hosebirdClient = builder.build();
	return hosebirdClient;
}

Notice, that this method expects two arguments: one is the BlockingQueue which is used as a message queue for the tweets and another is the List of terms we want our tweets to be filtered with (in our case “tea”, “coffee” & “beer”). So we are configuring our client to return real time filtered tweets (tweets with terms “tea”, “coffee” or “beer”).

Notice the line of code shown below:

Authentication hosebirdAuth = new OAuth1(consumerKey, consumerSecret, token, secret);

Twitter Java Client uses OAuth to provide authorised access to the Streaming API, which requires you to have the consumer/access keys and tokens.
So to stream Twitter data you must have the consumer/access keys and tokens.

4.2) Getting Twitter Consumer API/Access token keys:

Follow the link Getting Twitter Consumer API/Access token keys to obtain the keys and tokens.

After getting the Consumer API key, Consumer API secret key, Access token and Access token secret,add them as Strings in the Application class:

private final static String consumerKey = "xxxxxxxxxxxxxxxxxx";
private final static String consumerSecret = "xxxxxxxxxxxxxxxxxx";
private final static String token = "xxxxxxxxxxxxxxxxxx";
private final static String secret = "xxxxxxxxxxxxxxxxxx";

It is not advisable to put this info in the program itself and should be read from a config file but for brevity I am putting these values in Application class as static final Strings.

5) Configure the Elasticsearch Transport Client:

5.1) Create a static method createElasticTransportClient  in Application class and add the following lines of code:

public static TransportClient createElasticTransportClient() throws UnknownHostException {
	TransportClient client = new PreBuiltTransportClient(Settings.EMPTY)
			.addTransportAddress(new TransportAddress(InetAddress.getByName("localhost"), 9300));
	return client;
}

The above method returns a Transport Client which talks to locally running Elasticsearch on port 9300.

If your Elasticsearch is running on some other port or host then you may need to change the values of “localhost” to your “host” and “9300” to your “port”, if your Elasticsearch cluster name is different that “elasticsearch”, then you need to create the client like this:

TransportClient client = new PreBuiltTransportClient(Settings.builder().put("cluster.name", "myClusterName").build())
				.addTransportAddress(new TransportAddress(InetAddress.getByName("localhost"), 9300));

6) Streaming data from twitter:

Once the client establishes a connection:

// establish a connection
client.connect();

The blocking queue will now start being filled with messages. However we would like to read only first 1000 messages from the queue:

int count = 0;
while (!client.isDone() && count != 1000) {
  String msg = msgQueue.take(); // reading a tweet
  // Segregating the tweet and writing result to elasticsearch
  count++;
}

7) Segregating tweets based on terms and then indexing the segregated result to Elasticsearch:

For brevity I am streaming first 1000 tweets (containing terms “tea”, “coffee” & “beer”), segregating them one by one and indexing the results in Elasticsearch.

Example: Let’s say if a tweet contains the term “ tea ” then I will index the following document into Elasticsearch:

{ “tweet” : “tea” }

One thing I would like to clear: Let’s say if a tweet has tea and coffee both then I will consider only the first term. However, if you want to consider both the terms then hack into my repo stated at the end of this article.

This is how the complete Application class looks like:

package com.technocratsid.elastic;

import static org.elasticsearch.common.xcontent.XContentFactory.jsonBuilder;

import java.io.IOException;
import java.net.InetAddress;
import java.net.UnknownHostException;
import java.util.List;
import java.util.concurrent.BlockingQueue;
import java.util.concurrent.LinkedBlockingQueue;
import java.util.logging.Level;
import java.util.logging.Logger;

import org.elasticsearch.client.transport.TransportClient;
import org.elasticsearch.common.settings.Settings;
import org.elasticsearch.common.transport.TransportAddress;
import org.elasticsearch.transport.client.PreBuiltTransportClient;

import com.google.common.collect.Lists;
import com.twitter.hbc.ClientBuilder;
import com.twitter.hbc.core.Client;
import com.twitter.hbc.core.Constants;
import com.twitter.hbc.core.Hosts;
import com.twitter.hbc.core.HttpHosts;
import com.twitter.hbc.core.endpoint.StatusesFilterEndpoint;
import com.twitter.hbc.core.processor.StringDelimitedProcessor;
import com.twitter.hbc.httpclient.auth.Authentication;
import com.twitter.hbc.httpclient.auth.OAuth1;

public class Application {

	private final static String consumerKey = "xxxxxxxxxxxxxxxxxx";
	private final static String consumerSecret = "xxxxxxxxxxxxxxxxxx";
	private final static String token = "xxxxxxxxxxxxxxxxxx";
	private final static String secret = "xxxxxxxxxxxxxxxxxx";
	private static Logger logger = Logger.getLogger(Application.class.getName());

	public static void main(String[] args) {
		BlockingQueue<String> msgQueue = new LinkedBlockingQueue<String>(1000);
		List<String> terms = Lists.newArrayList("tea", "coffee", "beer");

		// Elasticsearch Transport Client
		TransportClient elasticClient = createElasticTransportClient();

		// Twitter HoseBird Client
		Client client = createTwitterClient(msgQueue, terms);
		client.connect();

		String msg = null;
		int count = 0;

		// Streaming 1000 tweets
		while (!client.isDone() && count != 1000) {
			try {
				msg = msgQueue.take();
				logger.log(Level.INFO, msg);

				// Segregating the tweets
				if (msg.contains(" tea ")) {
					insertIntoElastic(elasticClient, "tea");
				} else if (msg.contains(" coffee ")) {
					insertIntoElastic(elasticClient, "coffee");
				} else {
					insertIntoElastic(elasticClient, "beer");
				}
				count++;
			} catch (InterruptedException ex) {
				logger.log(Level.SEVERE, ex.getMessage());
				client.stop();
			}
		}
		
		// Closing the clients 
		client.stop();
		elasticClient.close();
	}

	public static Client createTwitterClient(BlockingQueue<String> msgQueue, List<String> terms) {
		Hosts hosebirdHosts = new HttpHosts(Constants.STREAM_HOST);
		StatusesFilterEndpoint hosebirdEndpoint = new StatusesFilterEndpoint();
		hosebirdEndpoint.trackTerms(terms); // tweets with the specified terms
		Authentication hosebirdAuth = new OAuth1(consumerKey, consumerSecret, token, secret);
		ClientBuilder builder = new ClientBuilder().name("Twitter-Elastic-Client").hosts(hosebirdHosts)
				.authentication(hosebirdAuth).endpoint(hosebirdEndpoint)
				.processor(new StringDelimitedProcessor(msgQueue));
		Client hosebirdClient = builder.build();
		return hosebirdClient;
	}

	@SuppressWarnings("resource")
	public static TransportClient createElasticTransportClient() {
		TransportClient client = null;
		try {
			client = new PreBuiltTransportClient(Settings.EMPTY)
					.addTransportAddress(new TransportAddress(InetAddress.getByName("localhost"), 9300));
		} catch (UnknownHostException ex) {
			logger.log(Level.SEVERE, ex.getMessage());
		}
		return client;
	}

	public static void insertIntoElastic(TransportClient client, String tweet) {
		try {
			client.prepareIndex("drink-popularity", "_doc")
					.setSource(jsonBuilder().startObject().field("tweet", tweet).endObject()).get();
		} catch (IOException e) {
			e.printStackTrace();
		}
	}

}

8) Configuring Canvas in Kibana:

Make sure your Kibana server is running. Mine is running locally at http://localhost:5601.

8.1) Go to http://localhost:5601.

8.2) Go to Dev Tools and perform the following requests:

PUT drink-popularity

The above PUT request creates an index drink-popularity.

PUT drink-popularity/_mapping/_doc
{
  "properties": {
    "tweet" : {
      "type" : "keyword"
    }
  }
}

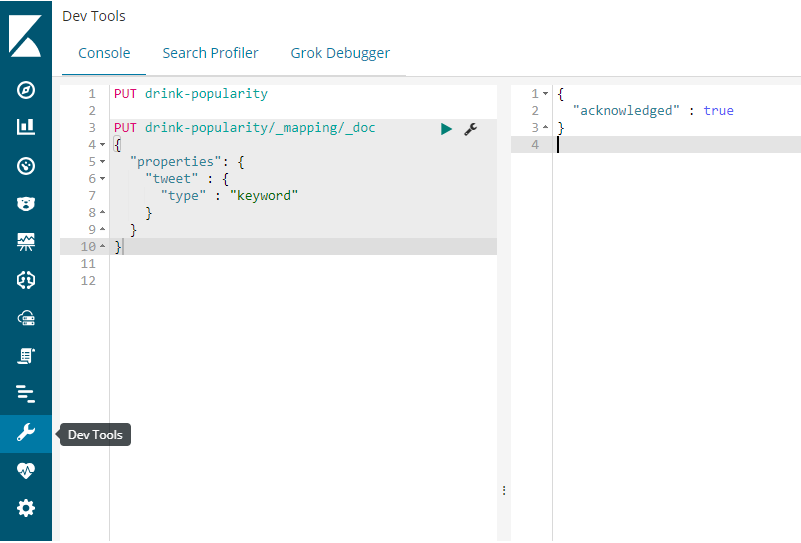
The above request adds a new field tweet to the _doc mapping type.

8.3) Go to Canvas:


8.4) I have already created a Canvas workpad. You just need to download it from here and import it in your own Canvas by clicking on Import workpad JSON file and then selecting the downloaded JSON file.

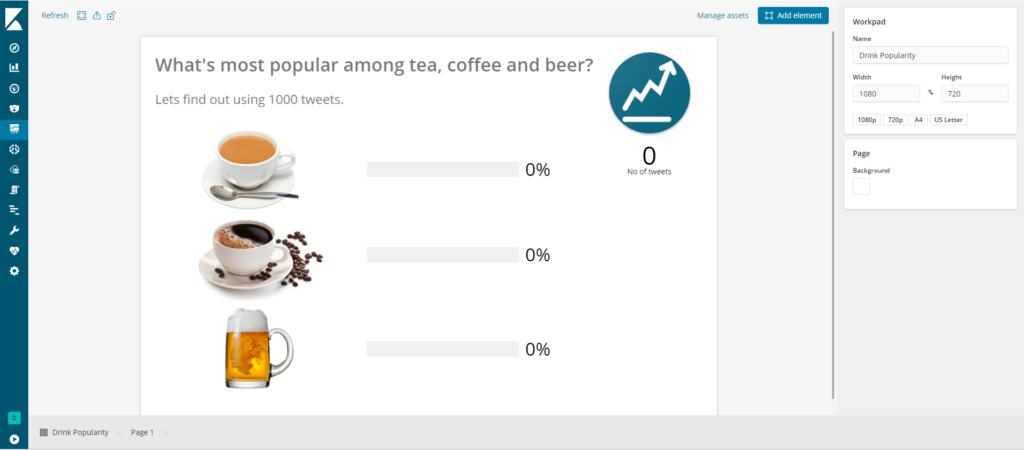
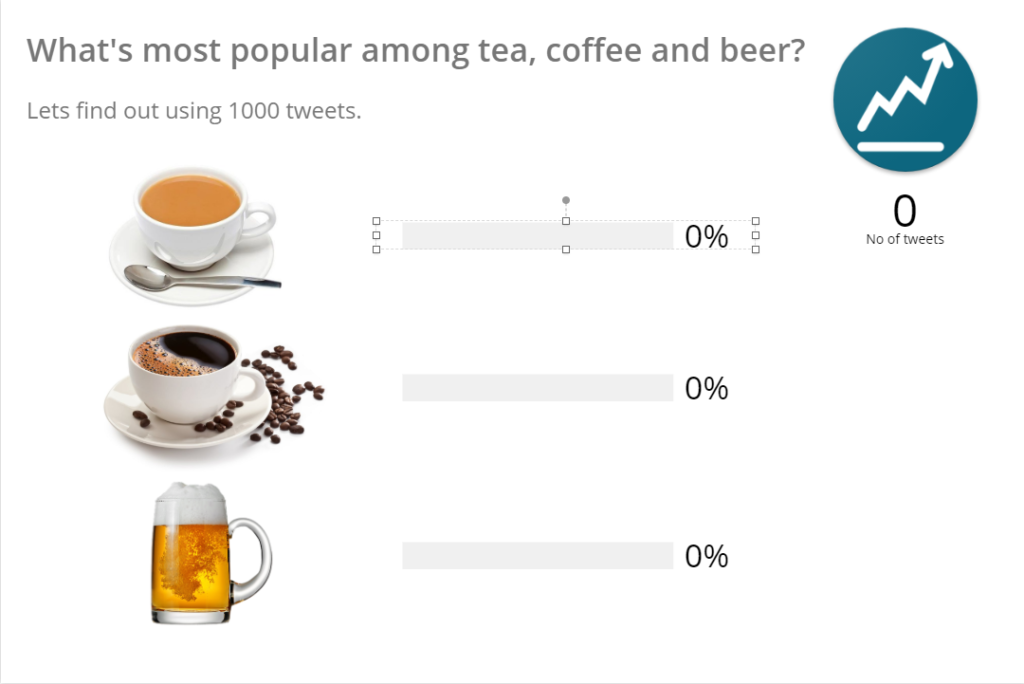
8.5) Once you have imported the workpad, open it by clicking on Drink Popularity workpad from Canvas workpads list.

This is what you should see:

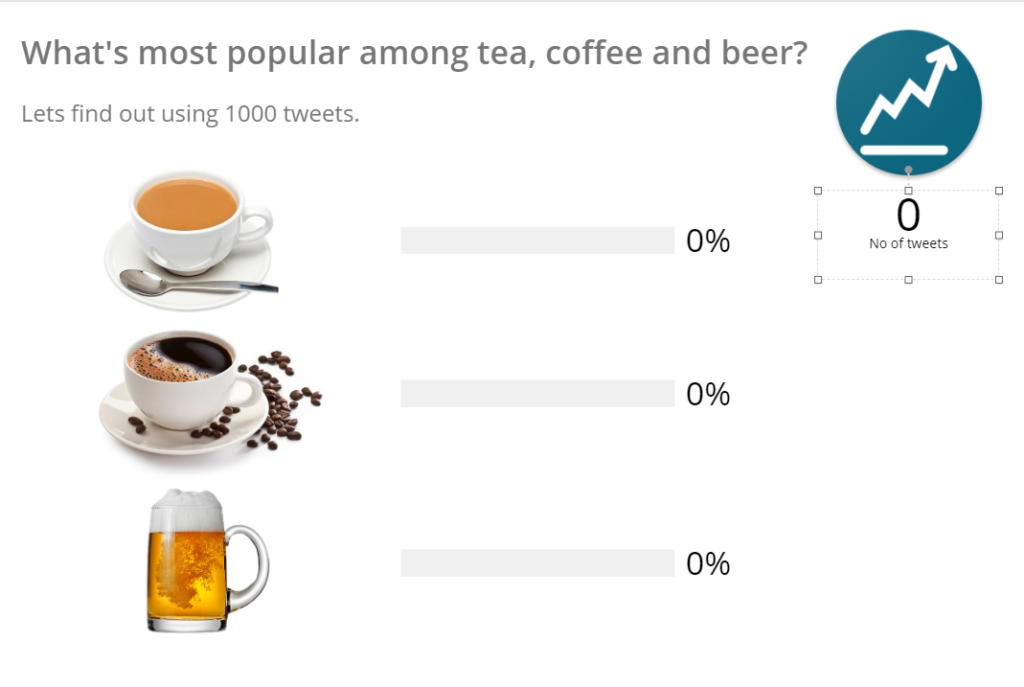
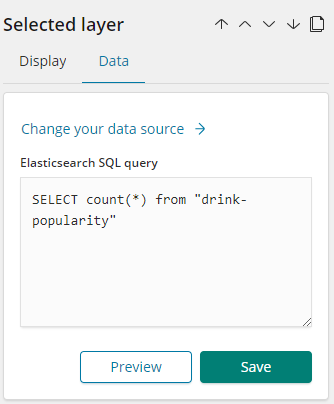
Now click on No of tweets metric:

On the side panel of Selected Layer click on Data:

Notice the Elasticsearch SQL query used to fetch total no of tweets. Looks familiar right?

The above Elasticsearch SQL counts the total number of documents in drink-popularity index.

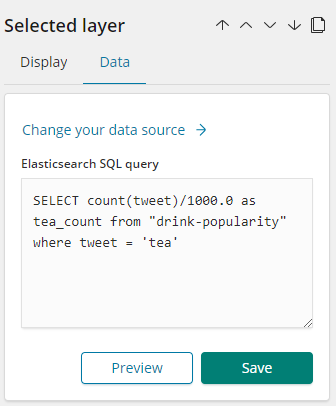
Do the same for one of the Horizontal progress bars:

Notice the Data panel:

So the above query is counting the no of tweets where tweet = ‘tea’ and dividing it by total no of tweets i.e. 1000.

Same thing has been done for other two progress bars.

9) Run the program to see live results in Canvas:

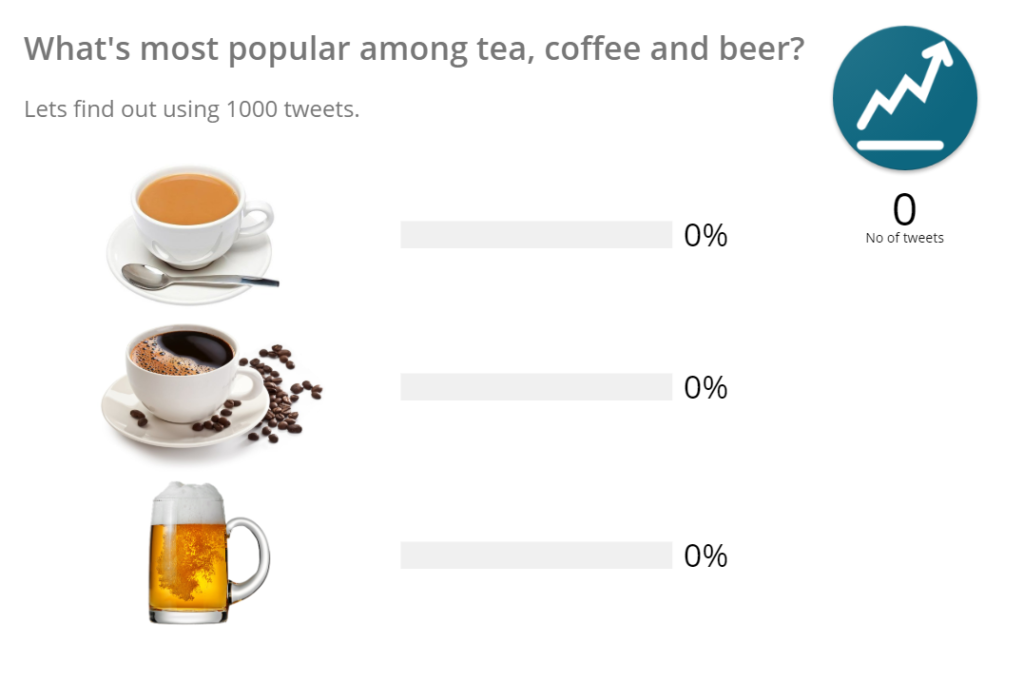
Before running the program the initial Canvas looks like this:

Now run the Application class and enable the auto-refresh in Canvas to see live updates and notice the Canvas.

After sometime:

In the end:

Cheers !!! Beer is the winner 🙂 You can also check the results for a specific location by filtering the tweets based on location.

I hope you guys like the concept.

Feel free to hack into the github repo.

Getting Twitter Consumer API/Access token keys

To get Twitter’s Consumer API keys and Access token keys you must have a Twitter account.

Once your Twitter Account is ready follow the steps below:

1) Go to https://developer.twitter.com/ and sign in to your Twitter Account.

2) Click on Apps as shown in the image below:

3) Then, click on Create an app (if you already have a Twitter App, then you can skip this step):

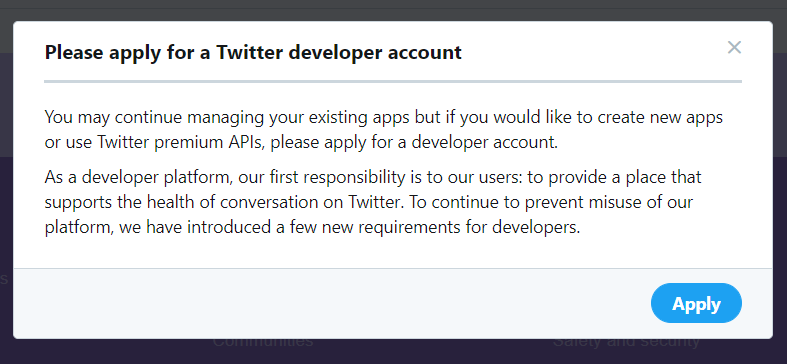
After clicking if you get a popup as shown below:

Then click on Apply as a Twitter Development account is mandatory to create new apps.

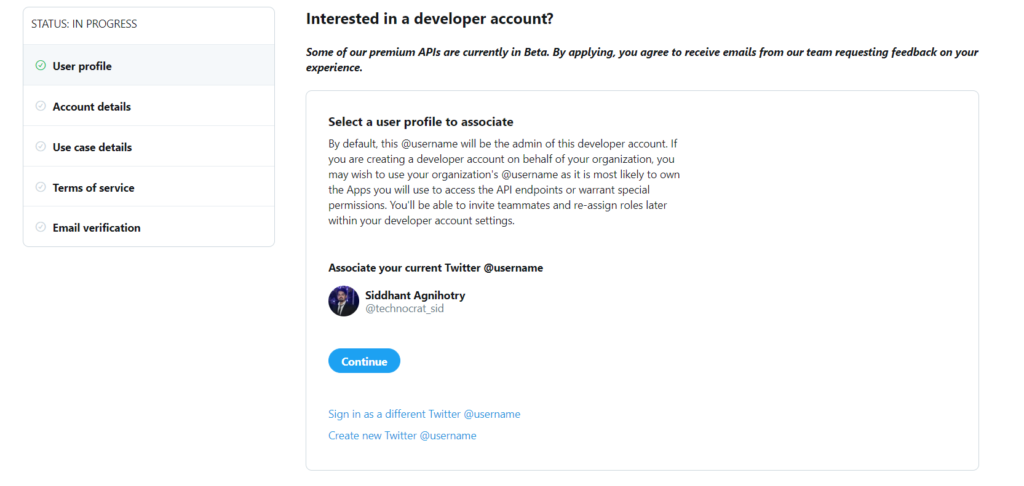
After that you’ll get a page as shown below:

Click on Continue.

Now you’ll see a page as shown below:

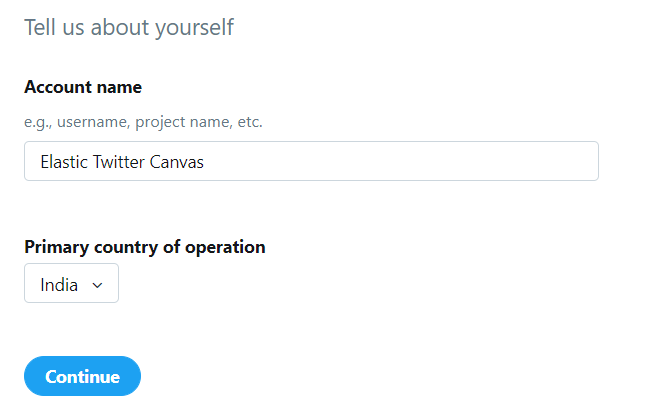
Select I am requesting access for my own personal use. After selecting this option, you’ll be asked to provide Account name and Primary country of operation

You can enter whatever you want but for the demonstration I am entering Elastic Twitter Canvas as Account name and India as Primary country of operation (see image below).

After that click on Continue.

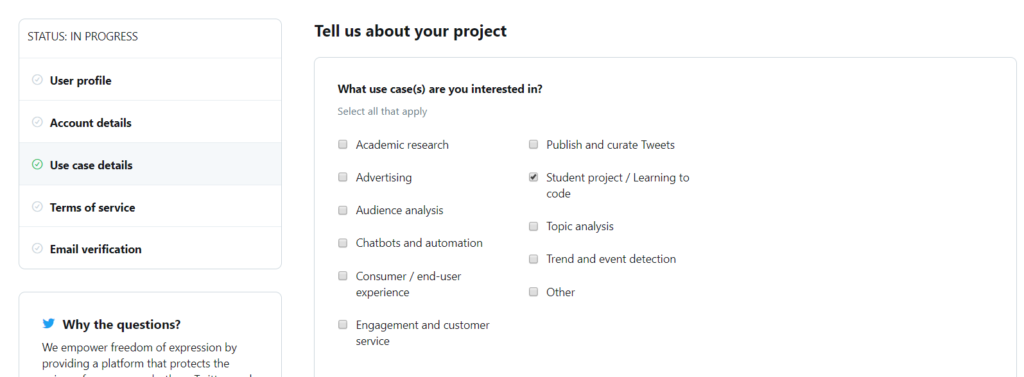
Now you’ll get a page shown in the below image. On the page, select Student project / Learning to code as your use case:

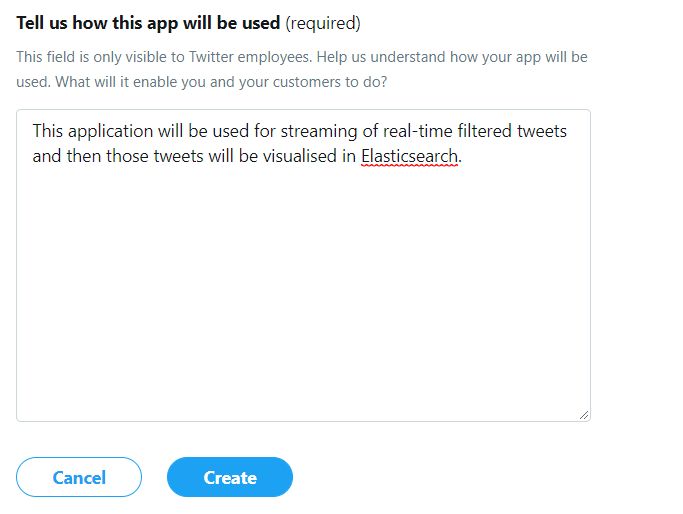
After that you’ve to describe few points about your project:

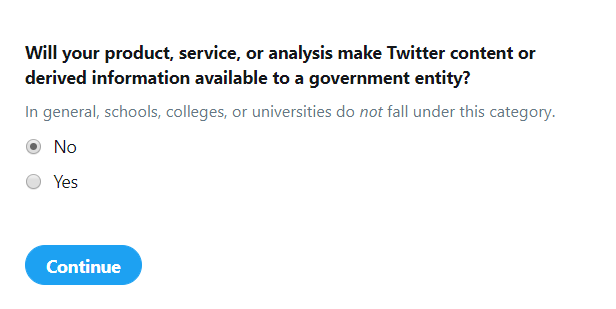
After writing at least 300 characters in the description box, select No for Will your product, service, or analysis make Twitter content or derived information available to a government entity? and then click on Continue:

In the next page accept the terms and conditions and click on Submit.

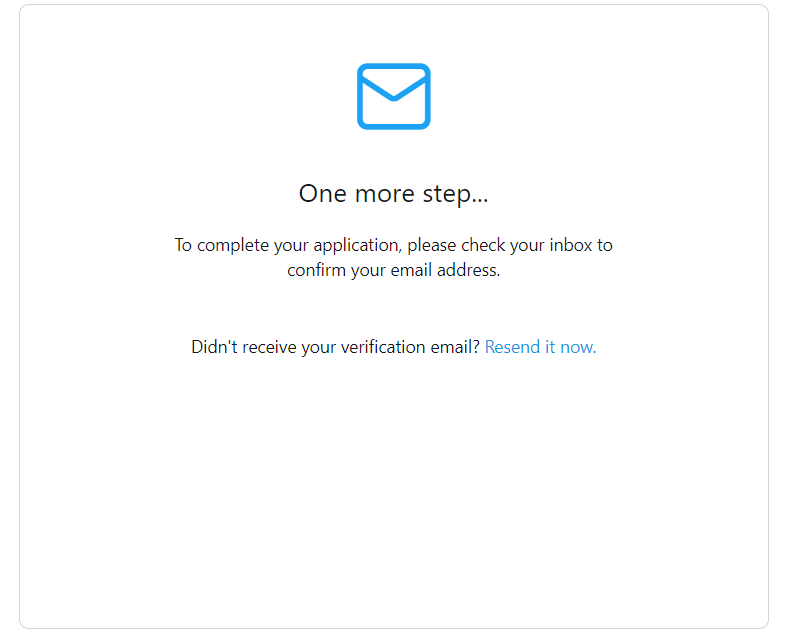
Once you click on Submit you’ll receive an email:

After that you need to verify your email and once the verification is done your Twitter Developer account will be ready.

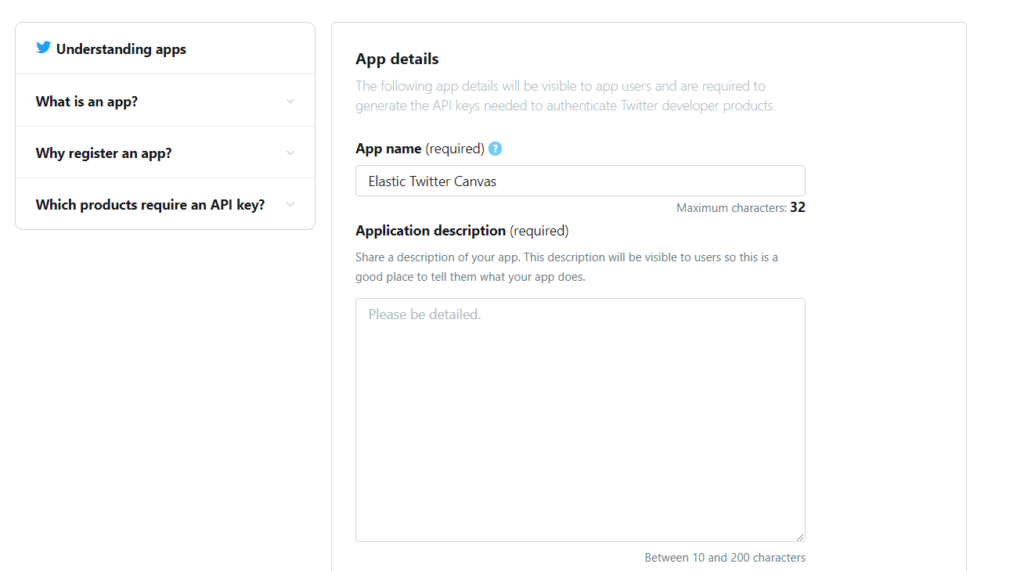
Once your Twitter Developer Account is ready, click on Apps and then click on Create an app.

Provide an App Name & Description:

Enter a valid website name in the Website URL field. Since our app is for personal use, this isn’t really applicable. I have just entered a sample value. Please enter valid details if you wish to host your application.

Write the description:

Then click on Create.

After that you’ll get a popup as shown below:

After reviewing the Developer terms, click on Create. 

Bingo Your Twitter App is created!!

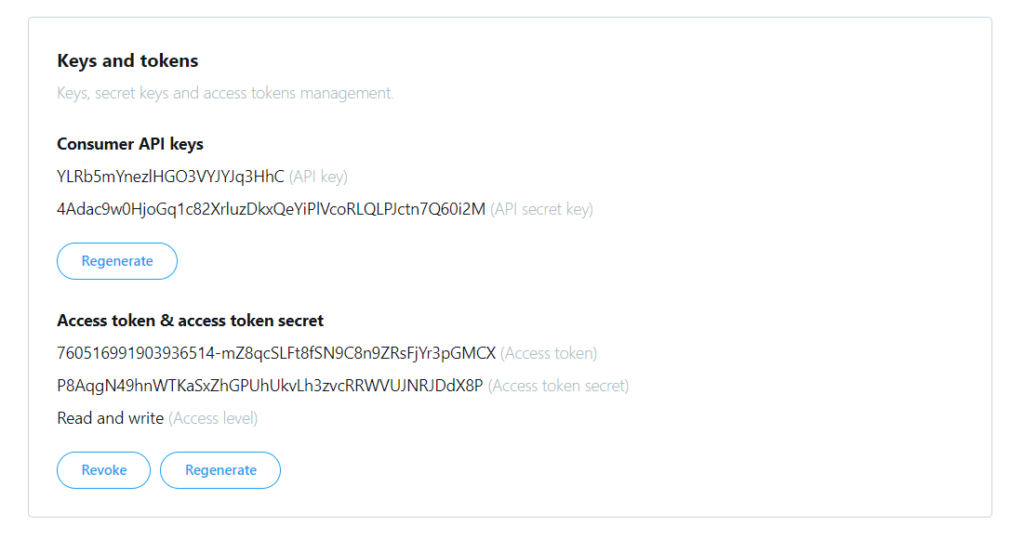
4) Getting the Keys and Tokens:

Click on Apps:

Click on Details:

After that go to Keys and Tokens:

These are my Customer API/Access keys and tokens. I have already changed the tokens and keys so you got no chance to access my data 😉

Spring Boot + Apache Spark

This post will guide you to create a simple web application using Spring Boot and Apache Spark.

For the demonstration we are going to build a maven project with Spring Boot 2.1.2 using the Spring Initializr web-based interface.

Cheers to the beginning 🙂

Please follow the steps below to create the classic Apache Spark’s WordCount example with Spring Boot :

1) Creating the Web Application template:

We’ll be using Spring Initializr to create the web application project structure.

Spring Initializr is a web application used to generate a Spring Boot project structure either in Maven or Gradle project specification.

Spring Initializr can be used in several ways, including:

  1. A web-based interface
  2. Using Spring Tool Suite
  3. Using the Spring Boot CLI

For brevity we’ll be using the Spring initializr web interface.

  1. Go to https://start.spring.io/.

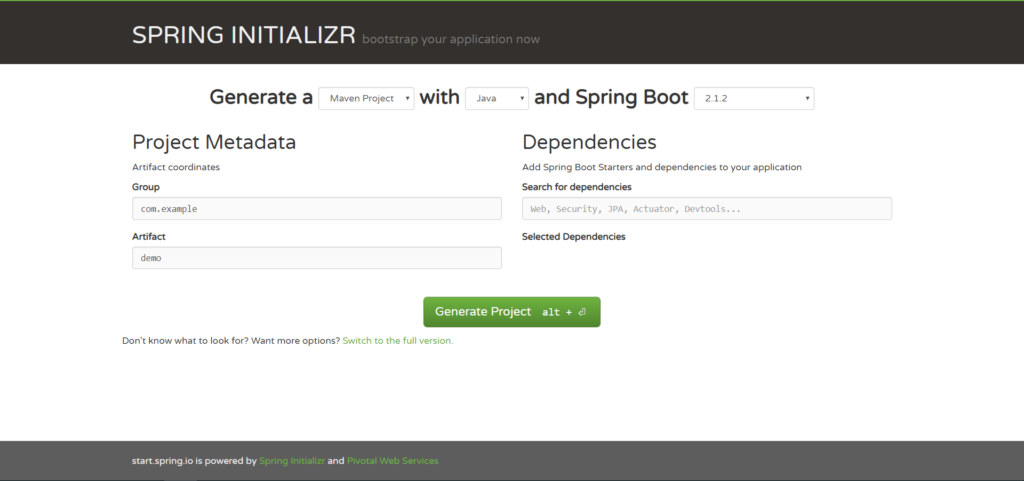
Note: By default, the project type is Maven Project and if you wish to select Gradle then just click on the Maven Project drop down and select Gradle Project.

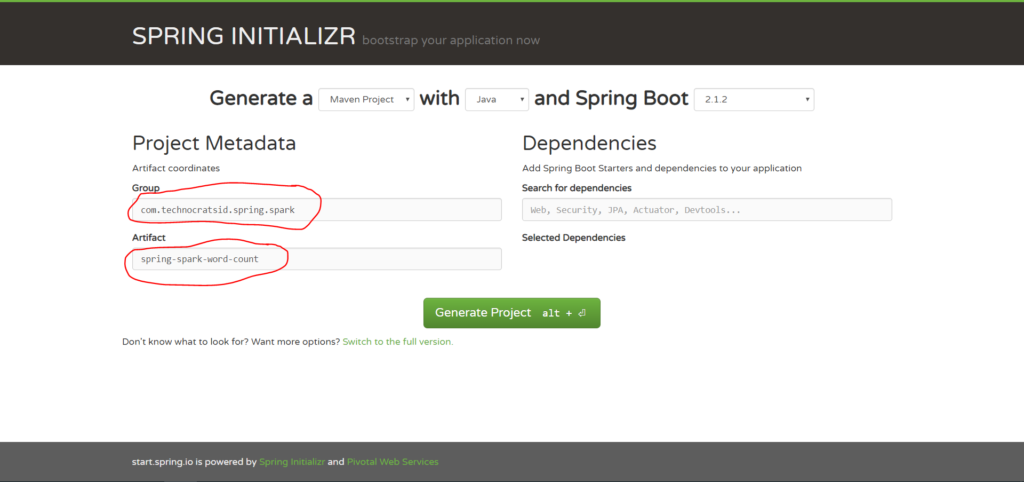
2. Enter Group and Artifact details:

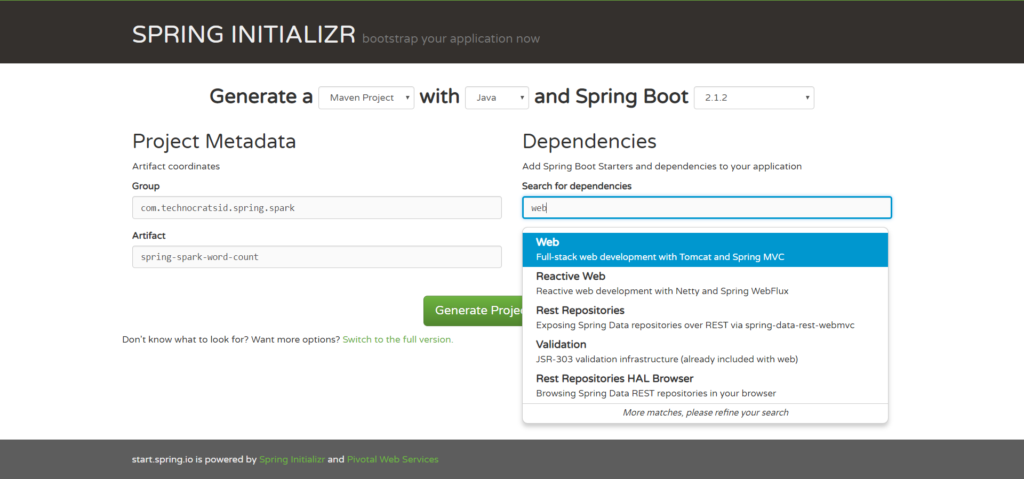
3. Type Web in Search for dependencies and select the Web option.

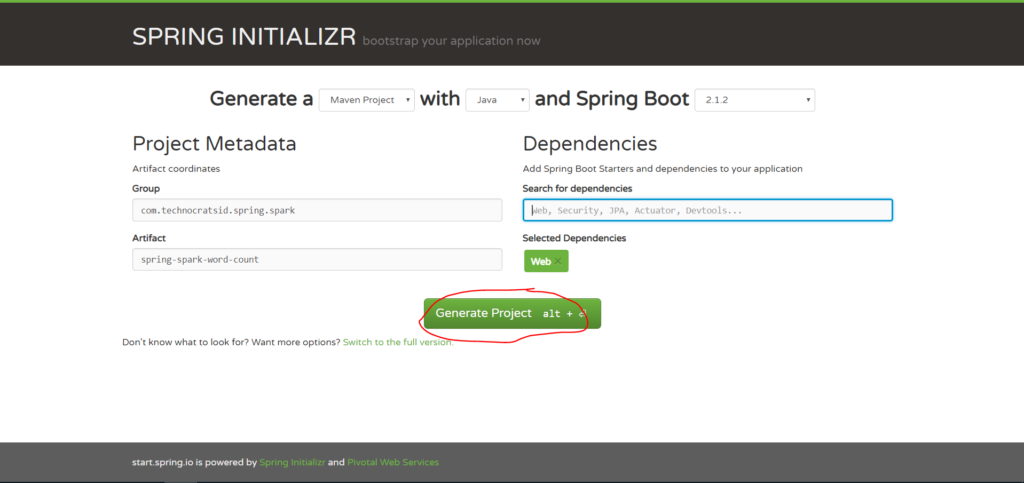
4. Now click on Generate Project:

This will generate and download the spring-spark-word-count.zip file which is your maven project structure.

5. Unzip the file and then import it in your favourite IDE.

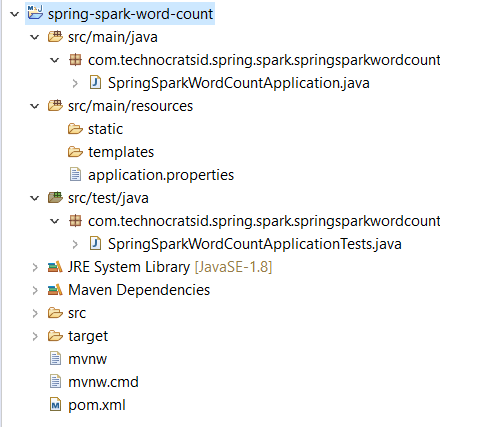
After you’ve imported the project in your IDE (in my case Eclipse) the project structure looks as follows:

The package names are automatically generated with the combination of group and artifact details.

Moving forward I’ve changed the package names from com.technocratsid.spring.spark.springsparkwordcount to com.technocratsid for brevity.

You can even do this while generating the project using Spring Initializr web interface. You just have to switch to full version and there you’ll find the option to change the package name.

2) Adding the required dependencies in pom.xml:

Add the following dependencies in your project’s pom.xml

<dependency>
	<groupId>com.thoughtworks.paranamer</groupId>
	<artifactId>paranamer</artifactId>
	<version>2.8</version>
</dependency>
<dependency>
	<groupId>org.apache.spark</groupId>
	<artifactId>spark-core_2.12</artifactId>
	<version>2.4.0</version>
</dependency>

Note: You might be thinking why we need to add the paranamer dependency as spark core dependency already has it? This is because JDK8 is compatible with paranamer version 2.8 or above and spark 2.4.0 uses paranamer version 2.7. So, if you won’t add the 2.8 version, you’ll get an error like this:

Request processing failed; nested exception is java.lang.ArrayIndexOutOfBoundsException: 10582

After this your complete pom.xml should look as follows:

<?xml version="1.0" encoding="UTF-8"?>
<project xmlns="http://maven.apache.org/POM/4.0.0"
	xmlns:xsi="http://www.w3.org/2001/XMLSchema-instance"
	xsi:schemaLocation="http://maven.apache.org/POM/4.0.0 http://maven.apache.org/xsd/maven-4.0.0.xsd">
	<modelVersion>4.0.0</modelVersion>
	<parent>
		<groupId>org.springframework.boot</groupId>
		<artifactId>spring-boot-starter-parent</artifactId>
		<version>2.1.2.RELEASE</version>
		<relativePath /> <!-- lookup parent from repository -->
	</parent>
	<groupId>com.technocratsid.spring.spark</groupId>
	<artifactId>spring-spark-word-count</artifactId>
	<version>0.0.1-SNAPSHOT</version>
	<name>Spring Spark Word Count</name>
	<description>Demo project for Spring Boot</description>

	<properties>
		<java.version>1.8</java.version>
	</properties>

	<dependencies>
		<dependency>
			<groupId>org.springframework.boot</groupId>
			<artifactId>spring-boot-starter-web</artifactId>
		</dependency>
		<dependency>
			<groupId>com.thoughtworks.paranamer</groupId>
			<artifactId>paranamer</artifactId>
			<version>2.8</version>
		</dependency>
		<dependency>
			<groupId>org.apache.spark</groupId>
			<artifactId>spark-core_2.12</artifactId>
			<version>2.4.0</version>
		</dependency>
		<dependency>
			<groupId>org.springframework.boot</groupId>
			<artifactId>spring-boot-starter-test</artifactId>
			<scope>test</scope>
		</dependency>
	</dependencies>

	<build>
		<plugins>
			<plugin>
				<groupId>org.springframework.boot</groupId>
				<artifactId>spring-boot-maven-plugin</artifactId>
			</plugin>
		</plugins>
	</build>

</project>

3) Adding the Spark Config:

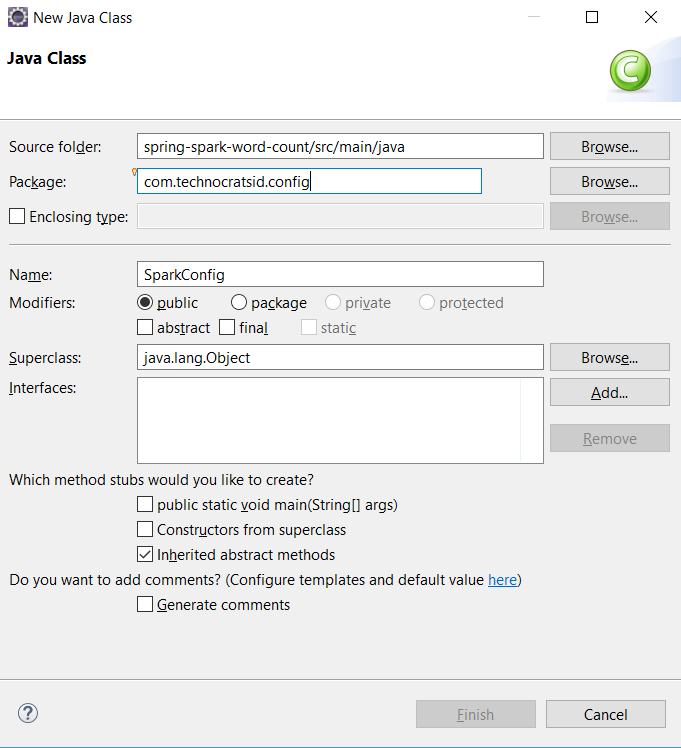
Create a class SparkConfig.java in package com.technocratsid.config.

Add the following content to SparkConfig.java:

@Configuration
public class SparkConfig {

	@Value("${spark.app.name}")
	private String appName;
	@Value("${spark.master}")
	private String masterUri;

	@Bean
	public SparkConf conf() {
		return new SparkConf().setAppName(appName).setMaster(masterUri);
	}

	@Bean
	public JavaSparkContext sc() {
		return new JavaSparkContext(conf());
	}

}

Import the packages.

Note: Here we are declaring the JavaSparkContext and SparkConf as beans (using @Bean annotation) this tell the spring container to manage them for us.

@Configuration is used to tell Spring that this is a Java-based configuration file and contains the bean definitions.

@Value annotation is used to inject value from a properties file based on the the property name.

The application.properties file for properties spark.app.name and spark.master is inside src/main/resources and looks like this:

spark.app.name=Spring Spark Word Count Application
spark.master=local[2]

local[2] indicates to run spark locally with 2 worker threads.

If you wish to run the application with your remote spark cluster then edit spark.master pointing to your remote cluster.

4) Creating a service for Word Count:

Create a class WordCountService.java in package com.technocratsid.service and add the following content:

@Service
public class WordCountService {

	@Autowired
	JavaSparkContext sc;

	public Map<String, Long> getCount(List<String> wordList) {
		JavaRDD<String> words = sc.parallelize(wordList);
		Map<String, Long> wordCounts = words.countByValue();
		return wordCounts;
	}

}

Import the packages.

Note: This class holds our business logic which is converting the list of words into a JavaRDD and then counting them by value by calling countByValue() and returning the results.

@Service tells Spring that this file performs a business service.

@Autowired tells Spring to automatically wire or inject the value of variable from the beans which are managed by the the spring container.

5) Register a REST Controller with an endpoint:

Create a class WordCountController.java in package com.technocratsid.controller and add the following content:

@RestController
public class WordCountController {

	@Autowired
	WordCountService service;

	@RequestMapping(method = RequestMethod.POST, path = "/wordcount")
	public Map<String, Long> count(@RequestParam(required = true) String words) {
		List<String> wordList = Arrays.asList(words.split("\\|"));
		return service.getCount(wordList);
	}
}

Import the packages.

Note: This class registers an endpoint /wordcount for a POST request with a mandatory query parameter words which is basically a string like (“abc|pqr|xyz”) and we are splitting the words on pipes (|) to generate a list of words and then using our business service’s count() method with the list of words to get the word count.

6) Run the application:

Either run the SpringSparkWordCountApplication class as a Java Application from your IDE or use the following command:

mvn spring-boot:run

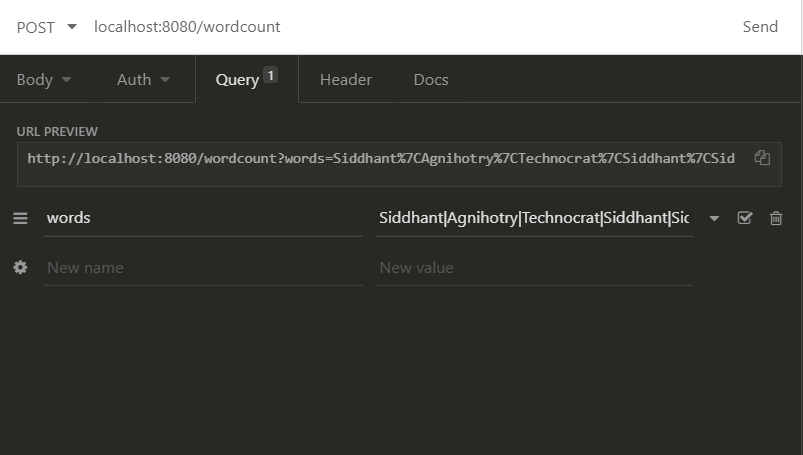
7) Test your application from a REST client:

For this demo I am using Insomnia REST Client which is quite handy with simple interface. You can use any REST client you want like Postman and Paw etc.

Once your application is up and running perform a POST request to the URL http://localhost:8080/wordcount with query parameter words=”Siddhant|Agnihotry|Technocrat|Siddhant|Sid”.

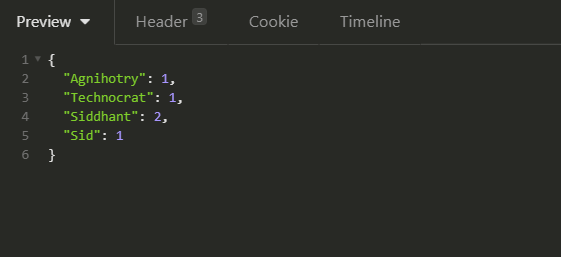
The response you’ll get:

You’ve just created your first Spring Boot Application and integrated Apache Spark with it.

If you want to hack into the code check out the github link.

Recommended book to learn Apache Spark: https://amzn.to/3f7XpAT

Sort strings alphabetically rather than lexicographically in Elasticsearch?

Let’s say we have a text field “name” in an elasticsearch index with the following values: Siddhant, SIDTECHNOCRAT, and sid.

Now follow the conventions mentioned in String Sorting in Elasticsearch, which talks about using a text field that is not analyzed for sorting.

I am assuming that you’ve followed the conventions mentioned in the above link.

For the demo I am using Elasticsearch 6.4.1.

Let’s index the names:

PUT /my_index/_doc/1
{ "name": "Siddhant" }

PUT /my_index/_doc/2
{ "name": "SIDTECHNOCRAT" }

PUT /my_index/_doc/3
{ "name": "sid" }

Let’s sort the names:

GET /my_index/user/_search?sort=name.keyword

Output:

SIDTECHNOCRAT 
Siddhant 
sid

Wait!! weren’t you expecting the result to be sid, Siddhant and SIDTECHNOCRAT.

You’re getting the results in the above order because the bytes used to represent capital letters have a lower ASCII value than the bytes used to represent lowercase letters, and as an international accepted standard, Elasticsearch follows ASCII sort order which is why the names are sorted with lowest bytes first.

In other words we’re getting results in lexicographical order which is perfectly fine for a machine but does not make much sense to human beings (expecting results to be sorted in alphabetical order).

If you want the results to be sorted in alphabetical order you should index each name in a way that ES should ignore the case while indexing.

To achieve this create a custom analyzer combining keyword tokenizer and lowercase token filter.

Then configure the text field you want to sort with the custom analyzer:

PUT /my_index
{
  "settings" : {
    "analysis" : {
      "analyzer" : {
        "custom_keyword_analyzer" : {
          "tokenizer" : "keyword",
          "filter" : ["lowercase"]
        }
      }
    }
  },
  "mappings" : {
    "_doc" : {
      "properties" : {
        "name" : {
          "type" : "text",
          "fields" : {
            "raw" : {
              "type" : "text",
              "analyzer" : "custom_keyword_analyzer",
              "fielddata": true
            }
          }
        }
      }
    }
  }
}
  • keyword tokenizer is used to consider the string as a whole and not splitting up into tokens.
  • lowercase filter is used to convert the token into small letters.
  • custom_keyword_analyzer is used with the multifield raw to sort the results alphabetically.

Index your data:

POST my_index/_doc/1
{ "name" : "Siddhant" }

POST my_index/_doc/2
{ "name" : "SIDTECHNOCRAT" }

POST my_index/_doc/3
{ "name" : "sid" }

Perform sort:

GET my_index/_doc/_search?sort=name.raw

Output:

sid 
Siddhant 
SIDTECHNOCRAT

Bingo !! You’ve got what you were expecting.

How to create an Elasticsearch 6.4.1 Plugin

A plugin provides a way to extend or enhance the basic functionality of Elasticsearch without having to fork it from GitHub.

Elasticsearch supports a plugin framework which provides many custom plugin classes that we can extend to create our own custom plugin.

A plugin is just a Zip file containing one or more jar files with compiled code and resources. Once a plugin is packaged, it can be easily added to an Elasticsearch installation using a single command.

This post will explain how to create an Elasticsearch plugin for Elasticsearch 6.4.1 with maven and Eclipse IDE.

If you follow along you’ll be able to create a “Hello World!” plugin demonstrating the classic hello world example.

Cheers to the beginning 🙂

Steps to create an Elasticsearch plugin

1. Setting up the plugin structure:

1.1) Create a maven project using Eclipse IDE (you can use any IDE, I personally prefer Eclipse and IntelliJ).


1.2) Skip the archetype selection.


1.3) Add the Group Id, Artifact Id and Name, then click finish.


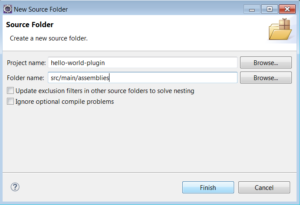
1.4) Create a source folder src/main/assemblies.


1.5) Click finish.


After this the plugin project structure should look like:

│

├── pom.xml

├── src

│   └── main

│       ├── assemblies

│       ├── java

│       └── resources

│

So the plugin skeleton is ready.

2. Configuring the plugin project:

2.1) Open the pom.xml and add elasticsearch dependency.

<properties>
  <elasticsearch.version>6.4.1</elasticsearch.version>
</properties>
<dependencies>
  <dependency>
    <groupId>org.elasticsearch</groupId>
    <artifactId>elasticsearch</artifactId>
    <version>${elasticsearch.version}</version>
    <scope>provided</scope>
  </dependency>
</dependencies>

Notice that the scope of elasticsearch dependency is provided. This is because the plugin will run in elasticsearch which is already provided.

2.2) Add the plugin descriptor file.

Elasticsearch recommends:

All plugins must contain a file called plugin-descriptor.properties.

This means you must provide a plugin-descriptor.properties which should be assembled with your plugin.

Create plugin-descriptor.properties file in scr/main/resources. 

and add the following content:

description=${project.description}
version=${project.version}
name=${project.artifactId}
classname=com.technocratsid.elasticsearch.plugin.HelloWorldPlugin
java.version=1.8
elasticsearch.version=${elasticsearch.version}

2.3) Add the plugin security policy file (Optional).

Some plugins require additional security permissions. A plugin can include an optional plugin-security.policy file containing grant statements for additional permissions..more

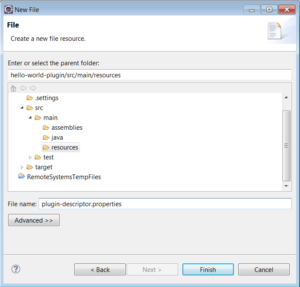
Create plugin-security.policy file in scr/main/resources. 

and add the following content:

grant {
permission java.security.AllPermission;
};

The above content is just a reference and you might require different set of permissions. To know more about JDK permissions refer this.

After the creation of plugin-security.policy file, you have to write proper security code around the operations requiring elevated privileges.

AccessController.doPrivileged(
  // sensitive operation
);

Note: We don’t need to perform this step for the Hello World Plugin. This is necessary if your plugin needs some security permissions. 

2.4) Create the plugin.xml file.

Create the plugin.xml file in src/main/assemblies which will be used to configure the packaging of the plugin.

and add the following content:

<?xml version="1.0"?>
<assembly>
  <id>plugin</id>
  <formats>
    <format>zip</format>
  </formats>
  <includeBaseDirectory>false</includeBaseDirectory>
  <fileSets>
    <fileSet>
      <directory>target</directory>
      <outputDirectory>/</outputDirectory>
      <includes>
        <include>*.jar</include>
      </includes>
    </fileSet>
  </fileSets>
  <files>
    <file>
      <source>${project.basedir}/src/main/resources/plugin-descriptor.properties</source>
      <outputDirectory>/</outputDirectory>
      <filtered>true</filtered>
    </file>
    <file>
      <source>${project.basedir}/src/main/resources/plugin-security.policy</source>
      <outputDirectory>/</outputDirectory>
      <filtered>false</filtered>
    </file>
  </files>
  <dependencySets>
    <dependencySet>
      <outputDirectory>/</outputDirectory>
      <unpack>false</unpack>
    </dependencySet>
  </dependencySets>
</assembly>

2.5) Declare the maven assembly plugin in the pom.xml.

<plugin>
  <groupId>org.apache.maven.plugins</groupId>
  <artifactId>maven-assembly-plugin</artifactId>
  <configuration>
    <appendAssemblyId>false</appendAssemblyId>
    <outputDirectory>${project.build.directory}/releases/</outputDirectory>
    <descriptors>
      <descriptor>${basedir}/src/main/assemblies/plugin.xml</descriptor>
    </descriptors>
  </configuration>
  <executions>
    <execution>
      <phase>package</phase>
      <goals>
        <goal>attached</goal>
      </goals>
    </execution>
  </executions>
</plugin>

2.6) Declare the maven compiler plugin in the pom.xml.

<plugin>
  <groupId>org.apache.maven.plugins</groupId>
  <artifactId>maven-compiler-plugin</artifactId>
  <version>3.5.1</version>
  <configuration>
    <source>1.8</source>
    <target>1.8</target>
  </configuration>
</plugin>

After some refactoring the complete pom.xml looks like this:

<project xmlns="http://maven.apache.org/POM/4.0.0" xmlns:xsi="http://www.w3.org/2001/XMLSchema-instance"
xsi:schemaLocation="http://maven.apache.org/POM/4.0.0 http://maven.apache.org/xsd/maven-4.0.0.xsd">
<modelVersion>4.0.0</modelVersion>
<groupId>com.technocratsid.elasticsearch.plugin</groupId>
<artifactId>hello-world-plugin</artifactId>
<version>0.0.1-SNAPSHOT</version>
<name>Hello World Elasticsearch Plugin</name>
<properties>
  <maven.compiler.source>1.8</maven.compiler.source>
  <maven.compiler.target>1.8</maven.compiler.target>
  <elasticsearch.version>6.4.1</elasticsearch.version>
  <maven.compiler.plugin.version>3.5.1</maven.compiler.plugin.version>
  <elasticsearch.assembly.descriptor>${basedir}/src/main/assemblies/plugin.xml</elasticsearch.assembly.descriptor>
</properties>
<dependencies>
  <dependency>
    <groupId>org.elasticsearch</groupId>
    <artifactId>elasticsearch</artifactId>
    <version>${elasticsearch.version}</version>
    <scope>provided</scope>
  </dependency>
</dependencies>
<build>
  <plugins>
    <plugin>
      <groupId>org.apache.maven.plugins</groupId>
      <artifactId>maven-compiler-plugin</artifactId>
      <version>${maven.compiler.plugin.version}</version>
      <configuration>
        <source>${maven.compiler.target}</source>
        <target>${maven.compiler.target}</target>
      </configuration>
    </plugin>
    <plugin>
      <groupId>org.apache.maven.plugins</groupId>
      <artifactId>maven-assembly-plugin</artifactId>
      <configuration>
        <appendAssemblyId>false</appendAssemblyId>
        <outputDirectory>${project.build.directory}/releases/</outputDirectory>
        <descriptors>
          <descriptor>${elasticsearch.assembly.descriptor}</descriptor>
        </descriptors>
      </configuration>
      <executions>
        <execution>
          <phase>package</phase>
          <goals>
            <goal>attached</goal>
          </goals>
        </execution>
      </executions>
    </plugin>
  </plugins>
</build>
</project>

3. Create the plugin classes:

3.1) Creating a new REST endpoint _hello. 

To create a new endpoint we should extend org.elasticsearch.rest.BaseRestHandler. But before doing that, initialize it in the plugin.

Create a class HelloWorldPlugin which extends org.elasticsearch.plugins.Plugin and implements the interface org.elasticsearch.plugins.ActionPlugin.

public class HelloWorldPlugin extends Plugin implements ActionPlugin {
}

Implement the getRestHandlers method:

public class HelloWorldPlugin extends Plugin implements ActionPlugin {
@Override
public List<RestHandler> getRestHandlers(final Settings settings,
                                         final RestController restController,
                                         final ClusterSettings clusterSettings,
                                         final IndexScopedSettings indexScopedSettings,
                                         final SettingsFilter settingsFilter,
                                         final IndexNameExpressionResolver indexNameExpressionResolver,
                                         final Supplier<DiscoveryNodes> nodesInCluster) {
        return Collections.singletonList(new HelloWorldRestAction(settings, restController));
    }
}

Now implement the HelloWorldRestAction class:

Create a class HelloWorldRestAction which extends org.elasticsearch.rest.BaseRestHandler.

public class HelloWorldRestAction extends BaseRestHandler {
    @Inject
    public HelloWorldRestAction(Settings settings, RestController restController) {
          super(settings);
    }

    @Override
    public String getName() {
          // TODO Auto-generated method stub
          return null;
    }

    @Override
    protected RestChannelConsumer prepareRequest(RestRequest request, NodeClient client) throws IOException {
          // TODO Auto-generated method stub
          return null;
     }
}

Register the endpoint _hello for a GET request:

@Inject
public HelloWorldRestAction(Settings settings, RestController restController) {
   super(settings);
   restController.registerHandler(RestRequest.Method.GET, "/_hello", this);
}

Implement the prepareRequest method to return “Hello World!” for a GET request to _hello endpoint:

@Override
protected RestChannelConsumer prepareRequest(RestRequest request, NodeClient client) throws IOException {
  return channel -> {
        XContentBuilder builder = channel.newBuilder();
        builder.startObject().field("message", "Hello World!").endObject();
        channel.sendResponse(new BytesRestResponse(RestStatus.OK, builder));
  };
}

After all these changes and some refactoring the HelloWorldRestAction class will look like:

public class HelloWorldRestAction extends BaseRestHandler {

private static String NAME = "_hello";

@Inject
public HelloWorldRestAction(Settings settings, RestController restController) {
   super(settings);
   restController.registerHandler(RestRequest.Method.GET, "/" + NAME, this);
}

@Override
public String getName() {
   return NAME;
}

@Override
protected RestChannelConsumer prepareRequest(RestRequest request, NodeClient client) throws IOException {
   return channel -> {
      XContentBuilder builder = channel.newBuilder();
      builder.startObject().field("message", "HelloWorld").endObject();
      channel.sendResponse(new BytesRestResponse(RestStatus.OK, builder));
   };
  }
}

4. Build the plugin:

mvn clean install

After this step you’ll find the packaged plugin Zip in target/releases folder of your plugin project.

5. Install the plugin:

You can install this plugin using the command:

bin\elasticsearch-plugin install file:///path/to/target/releases/hello-world-plugin-0.0.1-SNAPSHOT.zip

6. Test the plugin:

After installing the plugin start Elasticsearch.

bin\elasticsearch

Perform the following request in Kibana:

GET /_hello

Or, use curl:

curl -XGET "http://localhost:9200/_hello

Output:

{
  "message": "HelloWorld"
}

7. Conclusion:

You’ve got a head start !!

Now sky is the limit 🙂


References

String sorting in Elasticsearch

We should not sort on analyzed text field instead we should sort on not_analyzed text field.

Let’s understand this with an example:

Index some documents with a text field “name”.

POST my_index/_doc/1
{
  "name" : "technocrat sid"
}

POST my_index/_doc/2
{
  "name" : "siddhant01"
}

POST my_index/_doc/3
{
  "name" : "sid 01"
}

POST my_index/_doc/4
{
  "name" : "agnihotry siddhant"
}

Let’s sort the results in ascending order:

GET my_index/_search
{
  "sort": [
  {
    "name": {
      "order": "asc"
    }
  }
 ]
}

We get the results in the order:

sid 01

agnihotry siddhant

technocrat sid

siddhant 01

Wait !! Why did we not get the results in alphabetical order? We were expecting something like this:

agnihotry siddhant

sid 01

siddhant 01

technocrat sid


Reason that we did not get the results in the above order:

As we haven’t specified index mapping beforehand, we are relying on default mapping.  So in this case, the text field above will be analyzed with Standard Analyzer by default which mainly splits the text with spaces and removes stop words.

i.e. if we analyze “agnihotry siddhant”, it results in two terms “agnihotry” & “siddhant”.

which means when we index the text it is stored into tokens,

text --> tokens 
technocrat sid --> technocrat, sid 
siddhant01 --> siddhant01 
sid 01 --> sid, 01 
agnihotry siddhant --> agnihotry, siddhant


But we probably want to sort alphabetically on the first term, then on the second term, and so forth. In this case we should consider the text as whole instead of splitting it into tokens.

i.e. we should consider “technocrat sid”, “sid 01” and “agnihotry siddhant” as a whole which means we should not analyze the text field.

How do we not analyze a text field?

Before Elasticsearch 5.x

Before Elasticsearch 5.x text fields were stored as string. In order to consider a string field as a whole it should not be analyzed but we still need to perform a full text query on that same field.

So what we really want is to index the same field in two different ways, i.e. we want to sort and search on the same string field.

We can do this using multifield mapping:

"name": {
  "type": "string",
    "fields": {
      "raw": {
        "type":  "string",
        "index": "not_analyzed"
      }
   }
}  

The main name field is same as before: an analyzed full-text field. The new name.raw sub field is not_analyzed.

That means we can use the name field for search and name.raw field for sorting:

GET my_index/_search
{
  "sort": [
  {
    "name.raw": {
      "order": "asc"
    }
  }
 ]
}

After Elasticsearh 5.x

In Elasticsearch 5.x, the string type has been removed and there are now two new types: text, which should be used for full-text search, and keyword, which should be used for sort.

For instance, if you index the following document:

{
  "name": "sid"
}

Then the following dynamic mappings will be created:

{
  "name": {
    "type" "text",
    "fields": {
      "keyword": {
        "type": "keyword",
        "ignore_above": 256
      }
    }
  }
}

So you don’t have to specify not_analyzed explicitly for a text field after ES 5.x.

You can use name.keyword for sorting:

GET my_index/_search
{
  "sort": [
  {
    "name.keyword": {
      "order": "asc"
    }
  }
 ]
}

Elasticsearch plugin for Sentiment Analysis

I have created an Elasticsearch plugin for sentiment-analysis using Stanford CoreNLP libraries. The plugin is compatible with Elasticsearch 6.4.1.

Follow the below steps to use this plugin with your elasticsearch server:

1. Install the plugin

Windows: 

bin\elasticsearch-plugin install https://github.com/TechnocratSid/elastic-sentiment-analysis-plugin/releases/download/6.4.1/elastic-sentiment-analyis-plugin-6.4.1.zip

Unix:

sudo bin/elasticsearch-plugin install https://github.com/TechnocratSid/elastic-sentiment-analysis-plugin/releases/download/6.4.1/elastic-sentiment-analyis-plugin-6.4.1.zip

2. Starting Elasticsearch

How you start Elasticsearch depends on how you installed it. I’ve installed Elasticsearch on Windows with a .zip package, in my case I can start Elasticsearch from the command line using the following command:

.\bin\elasticsearch.bat

Note: To setup Elasticsearch follow the link Set up Elasticsearch.

3. Open Kibana

Perform the request mentioned below:

Example1:

POST _sentiment
{
"text" : "He is very happy"
}

Output: 

{
"sentiment_score": 3,
"sentiment_type": "Positive",
"very_positive": "38.0%",
"positive": "59.0%",
"neutral": "2.0%",
"negative": "0.0%",
"very_negative": "0.0%"
}

Example2:

POST _sentiment
{
"text" : "He is bad"
}

Output:

{
"sentiment_score": 1,
"sentiment_type": "Negative",
"very_positive": "1.0%",
"positive": "2.0%",
"neutral": "13.0%",
"negative": "66.0%",
"very_negative": "19.0%"
}

If you don’t want to use kibana use curl instead.

If you want to hack into the code check out the github link.

What is Type Safety ?

Definition

Type safety is prevention of typed errors in a programming language.

type error occurs when someone attempts to perform an operation on a value that doesn’t support that operation.

In simple words, type safety makes sure that an operation o which is meant to be performed on a data type x cannot be performed on data type y which does not support operation o.

That is, the language will not allow you to to execute o(y).

Example: 

Let’s consider JavaScript which is not type safe:

<!DOCTYPE html>
<html>
<body>
<script>
var number = 10; // numeric value
var string = "10"; // string value
var sum = number + string; // numeric + string
document.write(sum);
</script>
</body>
</html>

Output:

1010

The output is the concatenation of number and string.

Important point to note here is that JavaScript is allowing you to perform an arithmetic operation between an int and string.

As JavaScript is not type safe, you can add a numeric and string without restriction. This can lead to typed errors in type safe programming languages.

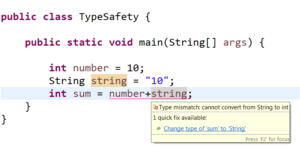
Let’s consider java which is type safe:

You can clearly observe that in java the compiler validates the types while compiling and throwing a compile time exception:

Type mismatch: cannot convert from String to int


As java is type safe, you cannot perform an arithmetic operation between an int and string.

Take away

Type-safe code won’t allow any invalid operation on an object and the operation’s validity depends on the type of the object.

Example of Java 8 Streams groupingBy feature

Statement: Let’s say you have a list of integers which you want to group into even and odd numbers.

Create a list of integers with four values 1,2,3 and 4:

List<Integer> numbers = new ArrayList<>();
numbers.add(1);
numbers.add(2);
numbers.add(3);
numbers.add(4);

Now group the list into odd and even numbers:

Map<String, List<Integer>> numberGroups= 
numbers.stream().collect(Collectors.groupingBy(i -> i%2 != 0 ? "ODD" : "EVEN"));

This returns a map of (“ODD/EVEN” -> numbers).

Printing the segregated list along with its offset (ODD/EVEN):

for (String offset : numberGroups.keySet()) {
  for (Integer i : numberGroups.get(offset)) {
    System.out.println(offset +":"+i);
  }
}

Outputs:

EVEN:2
EVEN:4
ODD:1
ODD:3

Refer Github for complete program.

Learn, Collaborate & Share !!

Exit mobile version